

It’s that time of year again, Halloween is just days away and of course my boys don’t want to dress up as a princess or super hero. My boys want to dress up as characters from their favorite video games.
We couldn’t find any Marionette costumes from the game, Five Nights at Freddy’s! So of course after searching and coming up with nothing I decided that it was a challenge that I just had to accept.
All you need is a clear image to print off for the mask. (you wont use this as the mask but you will use it as a guideline for cutting the shapes out of felt and foam. I found this image of the Marionette online and set it up as a PDF so you can download and print it out, however you may need to adjust the size to fit.
What you will need for the mask
- Marionette pdf
- Felt (One sheet of white, black, red and purple)
- Foam (I used white sticky foam)
- Scissors ( a really good pair that will cut through felt and foam)
- Craft knife (to cut out all of the little pieces)
- Needle and thread
- Elastic
- Fabric Glue
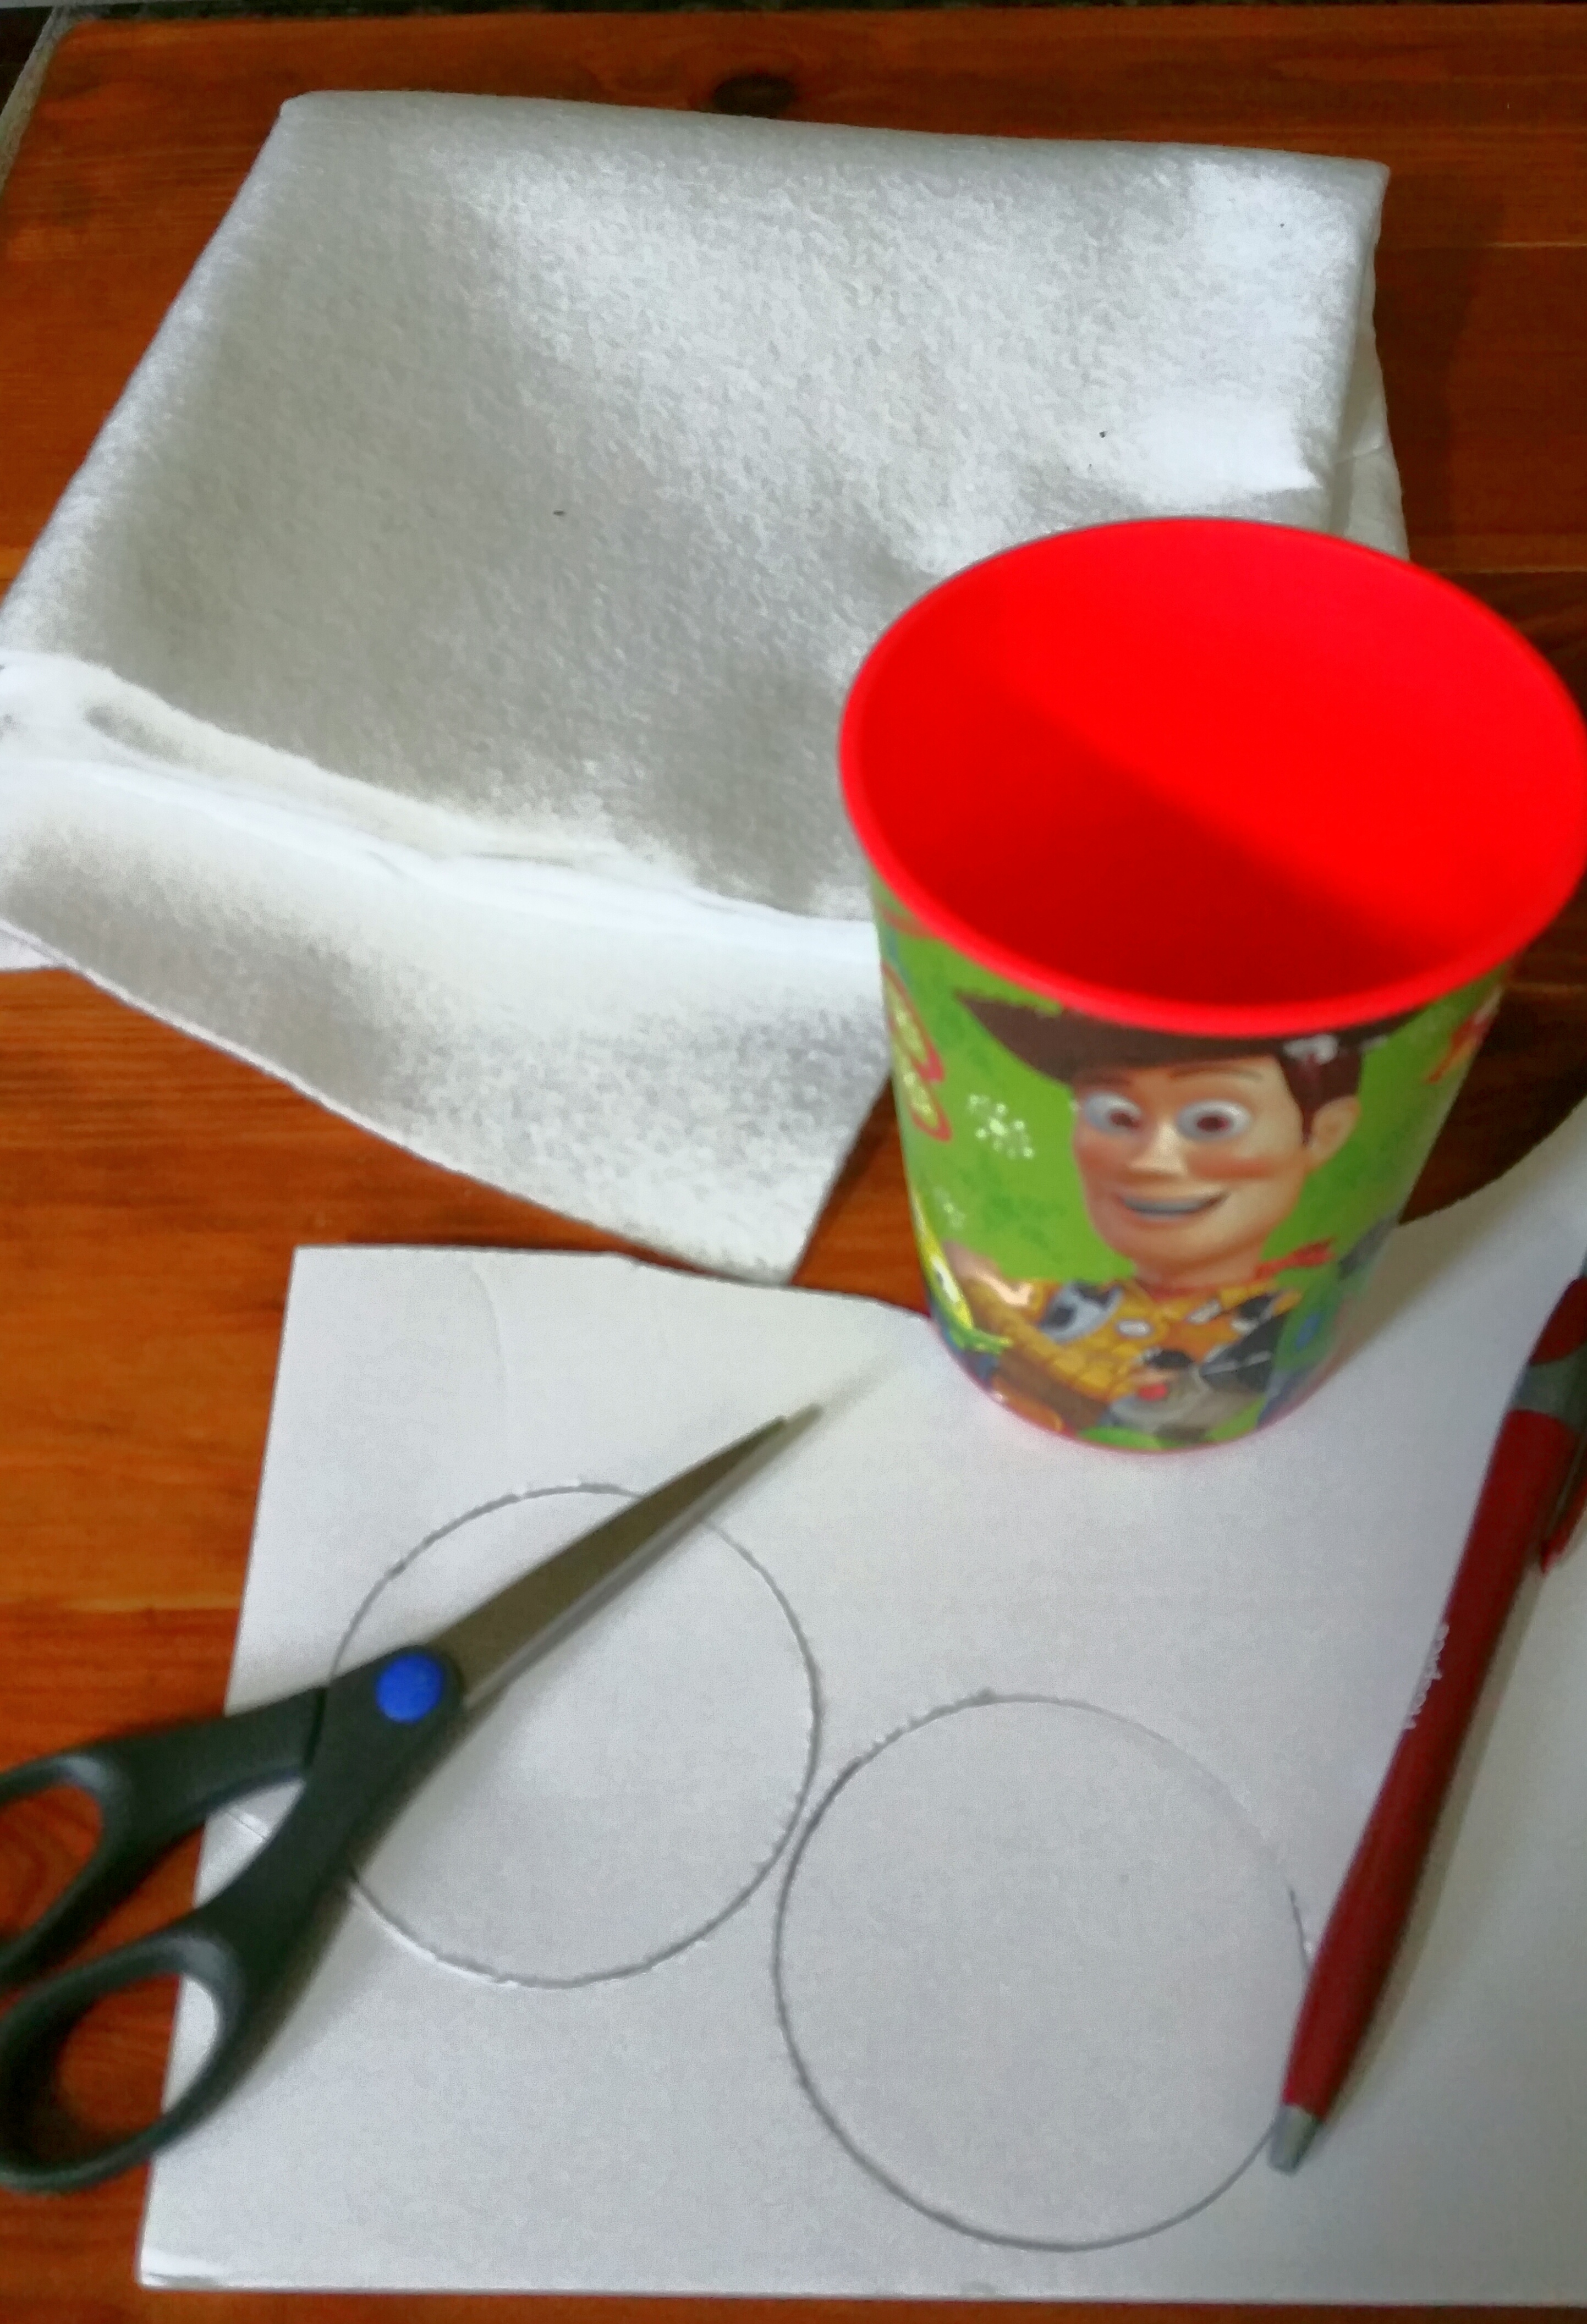
First off you will print your Marionette and then cut the face out so you have clear lines. I then taped it to a sheet of white felt and cut around it so that I had the shape of the face. I repeat this with a piece of white foam. The foam will give the mask some shape, this way it wont get stretched out or bend and distort the image.
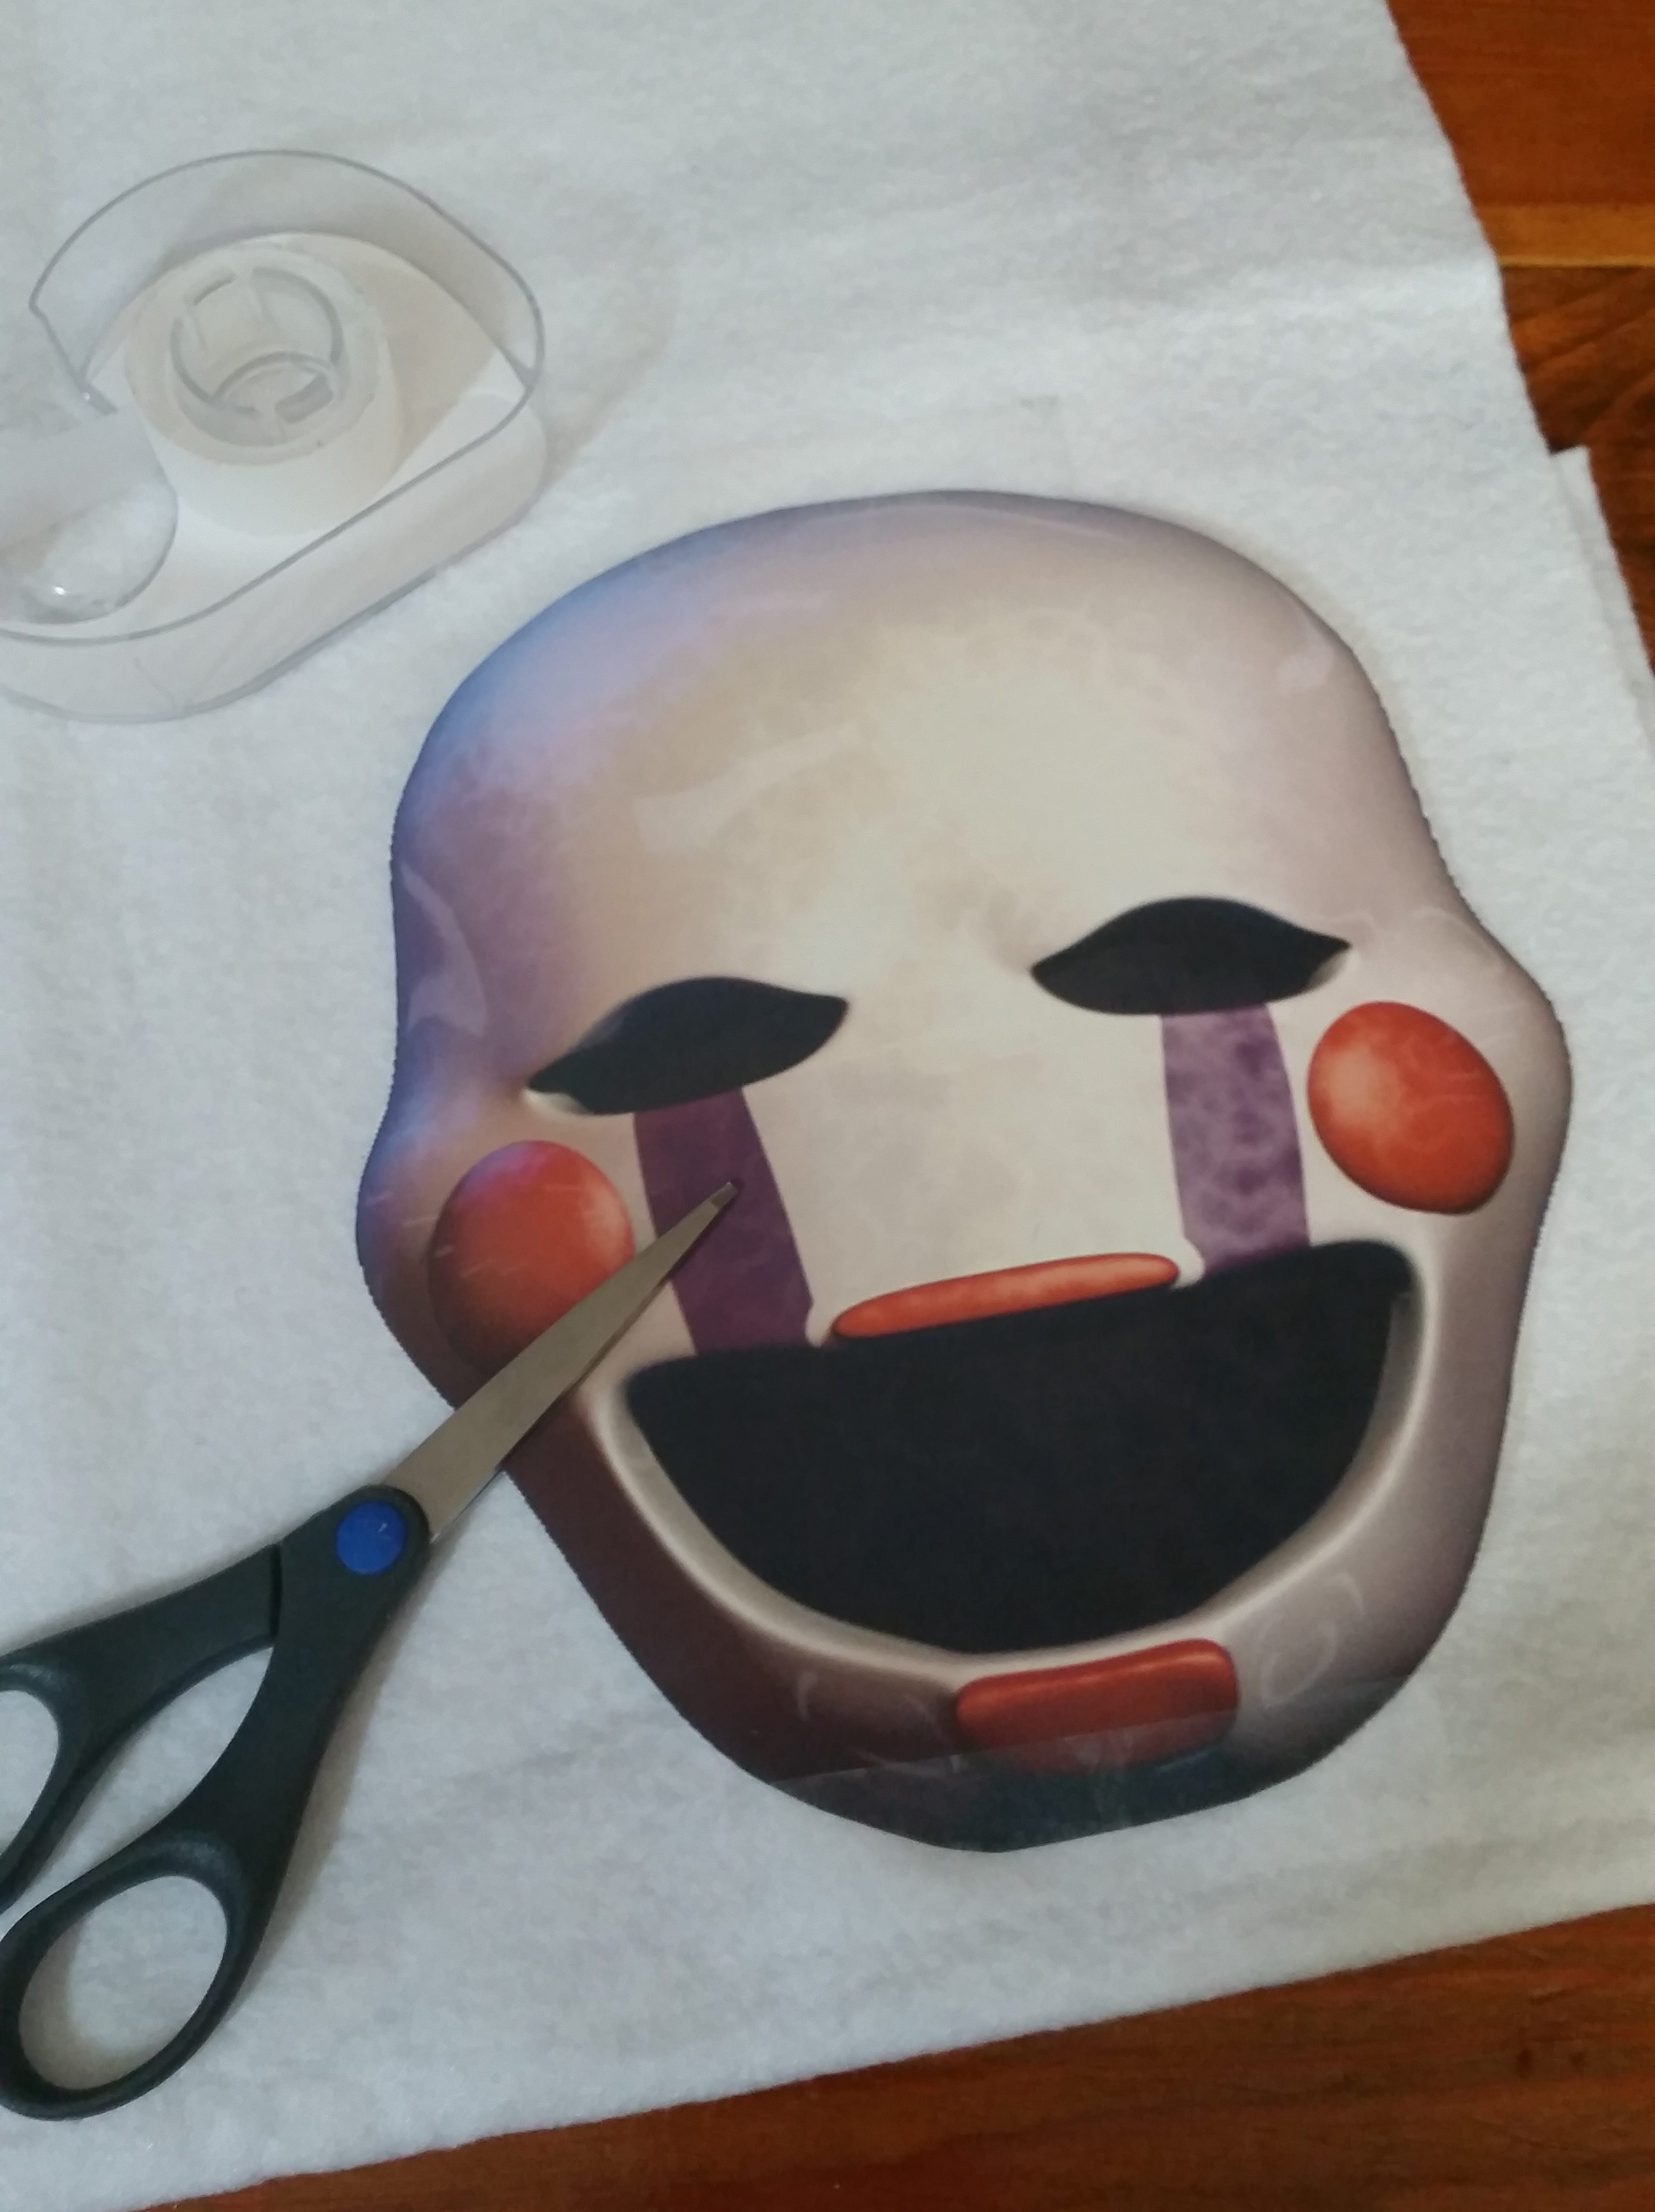
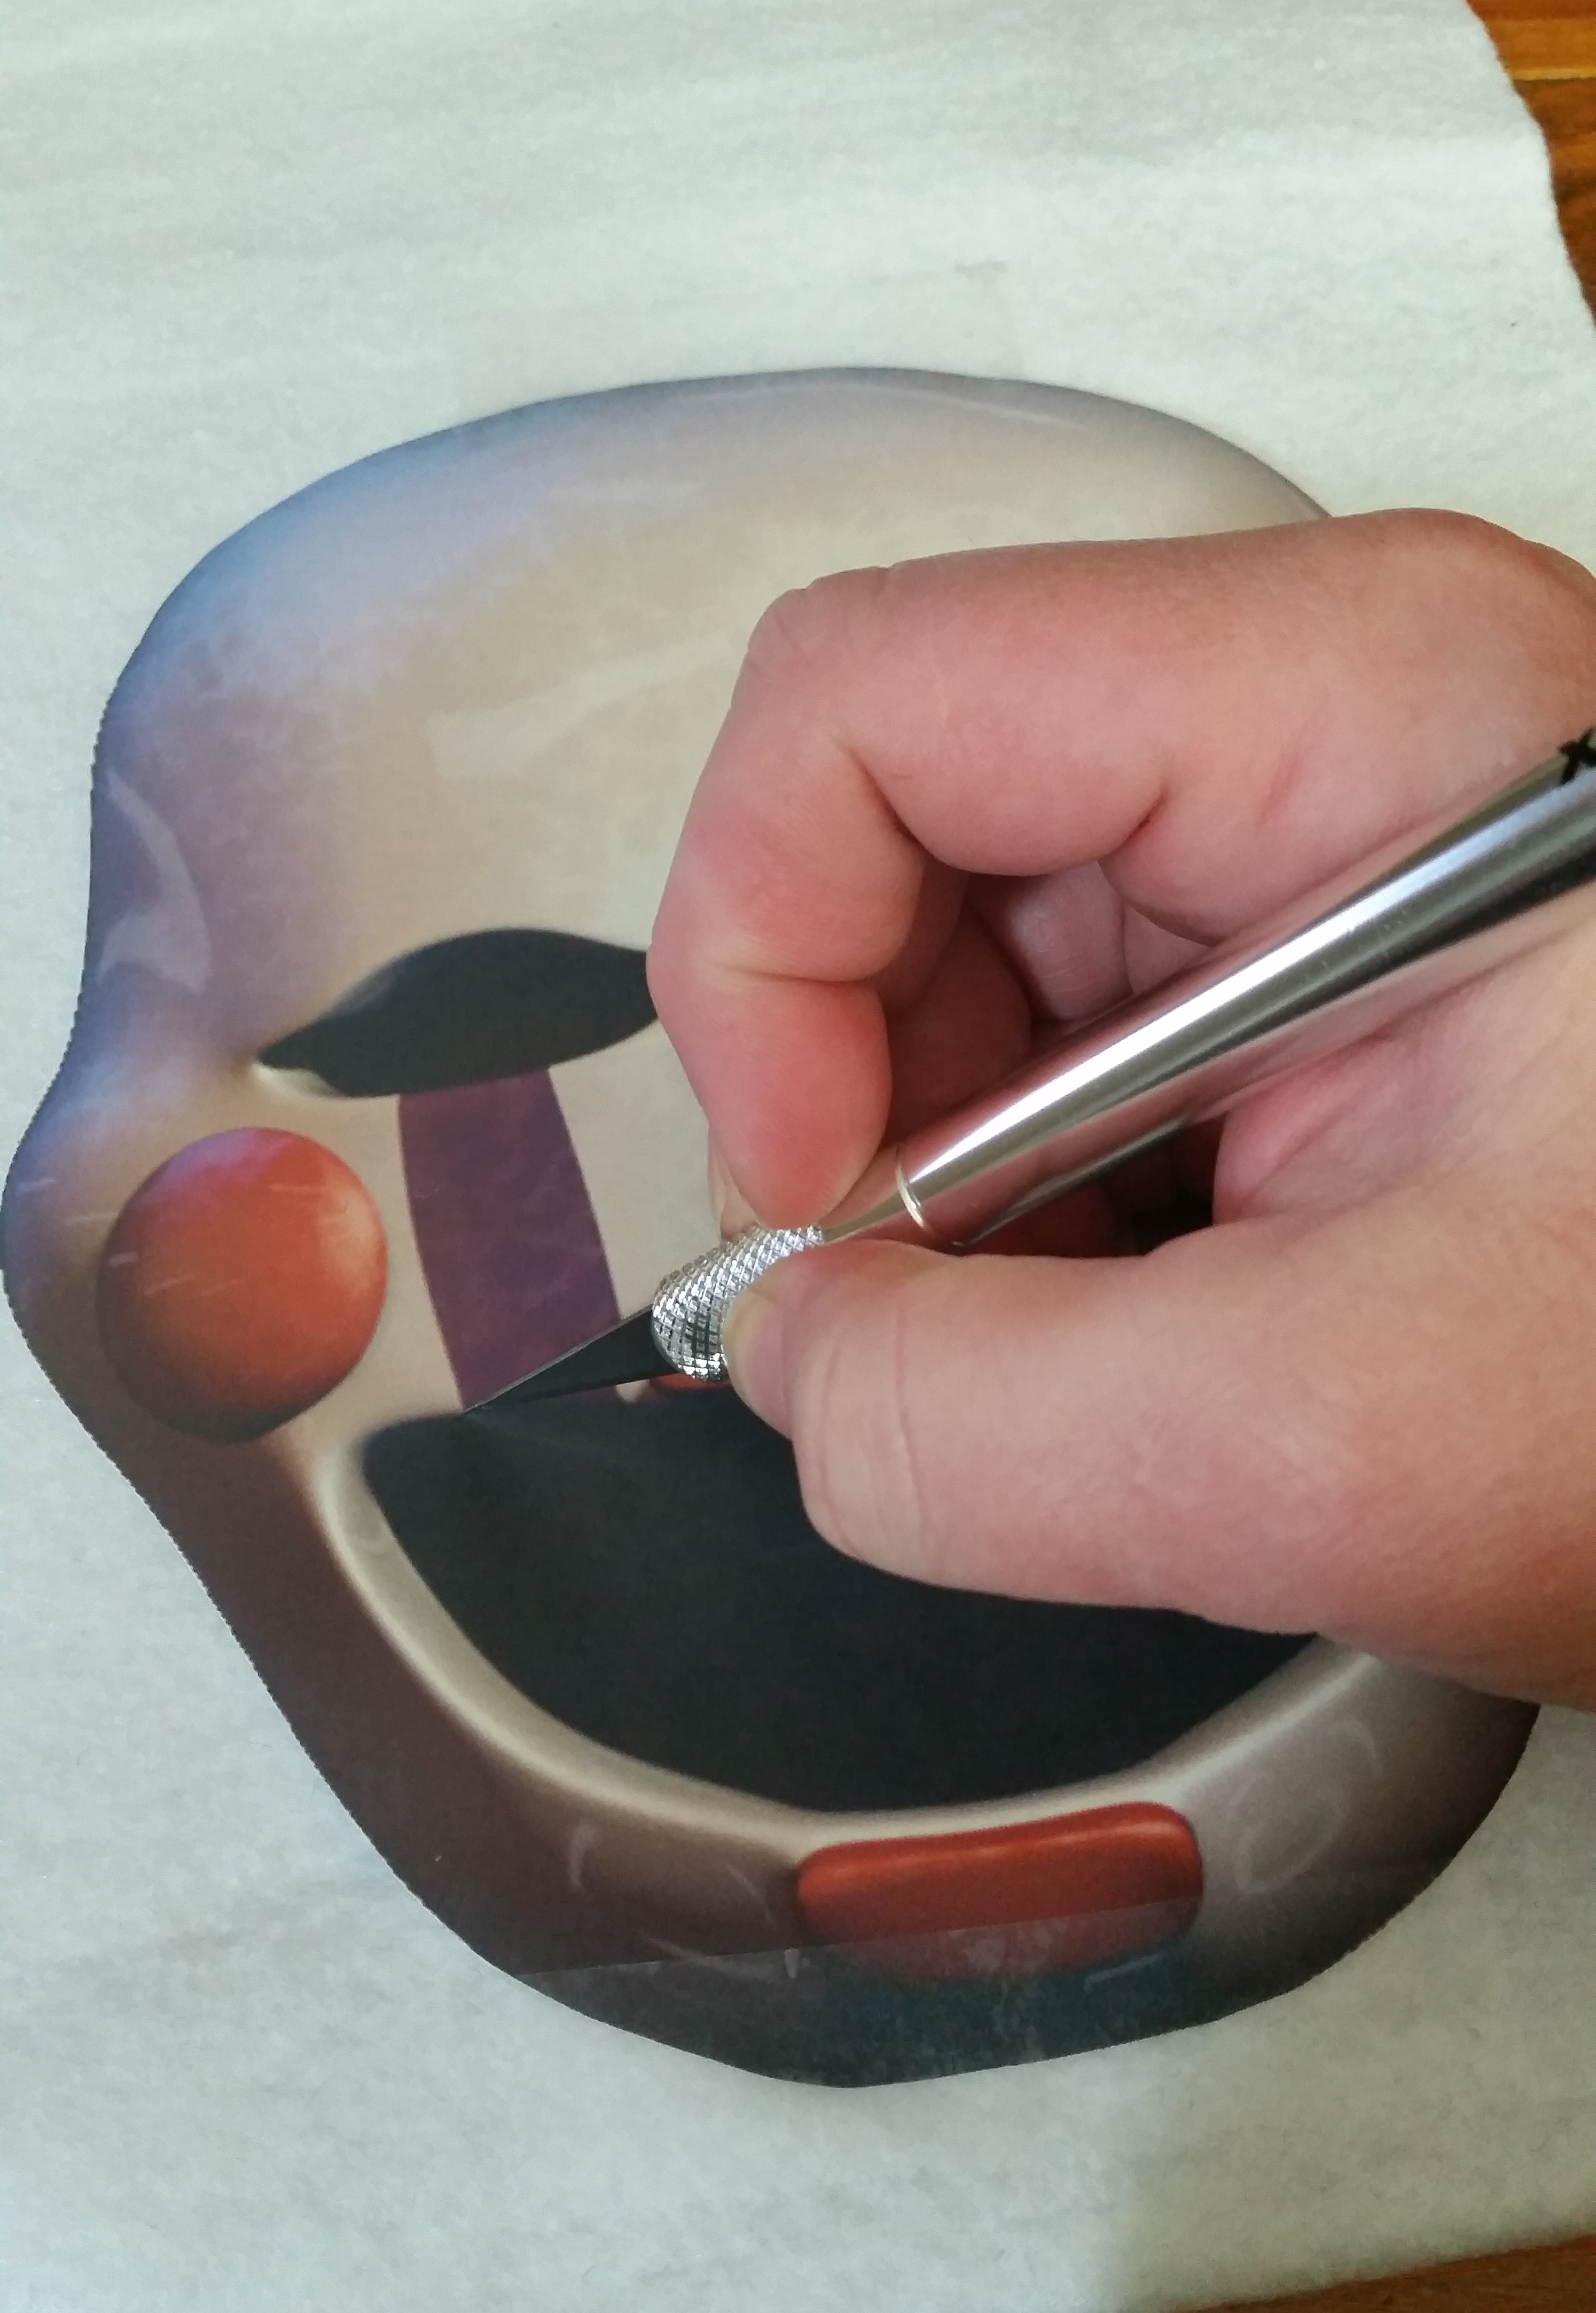
After the face is cut out I then cut out the eyes and mouth using my craft knife. Take it nice and slow here. You don’t want to cut out to much or ruin the mask.
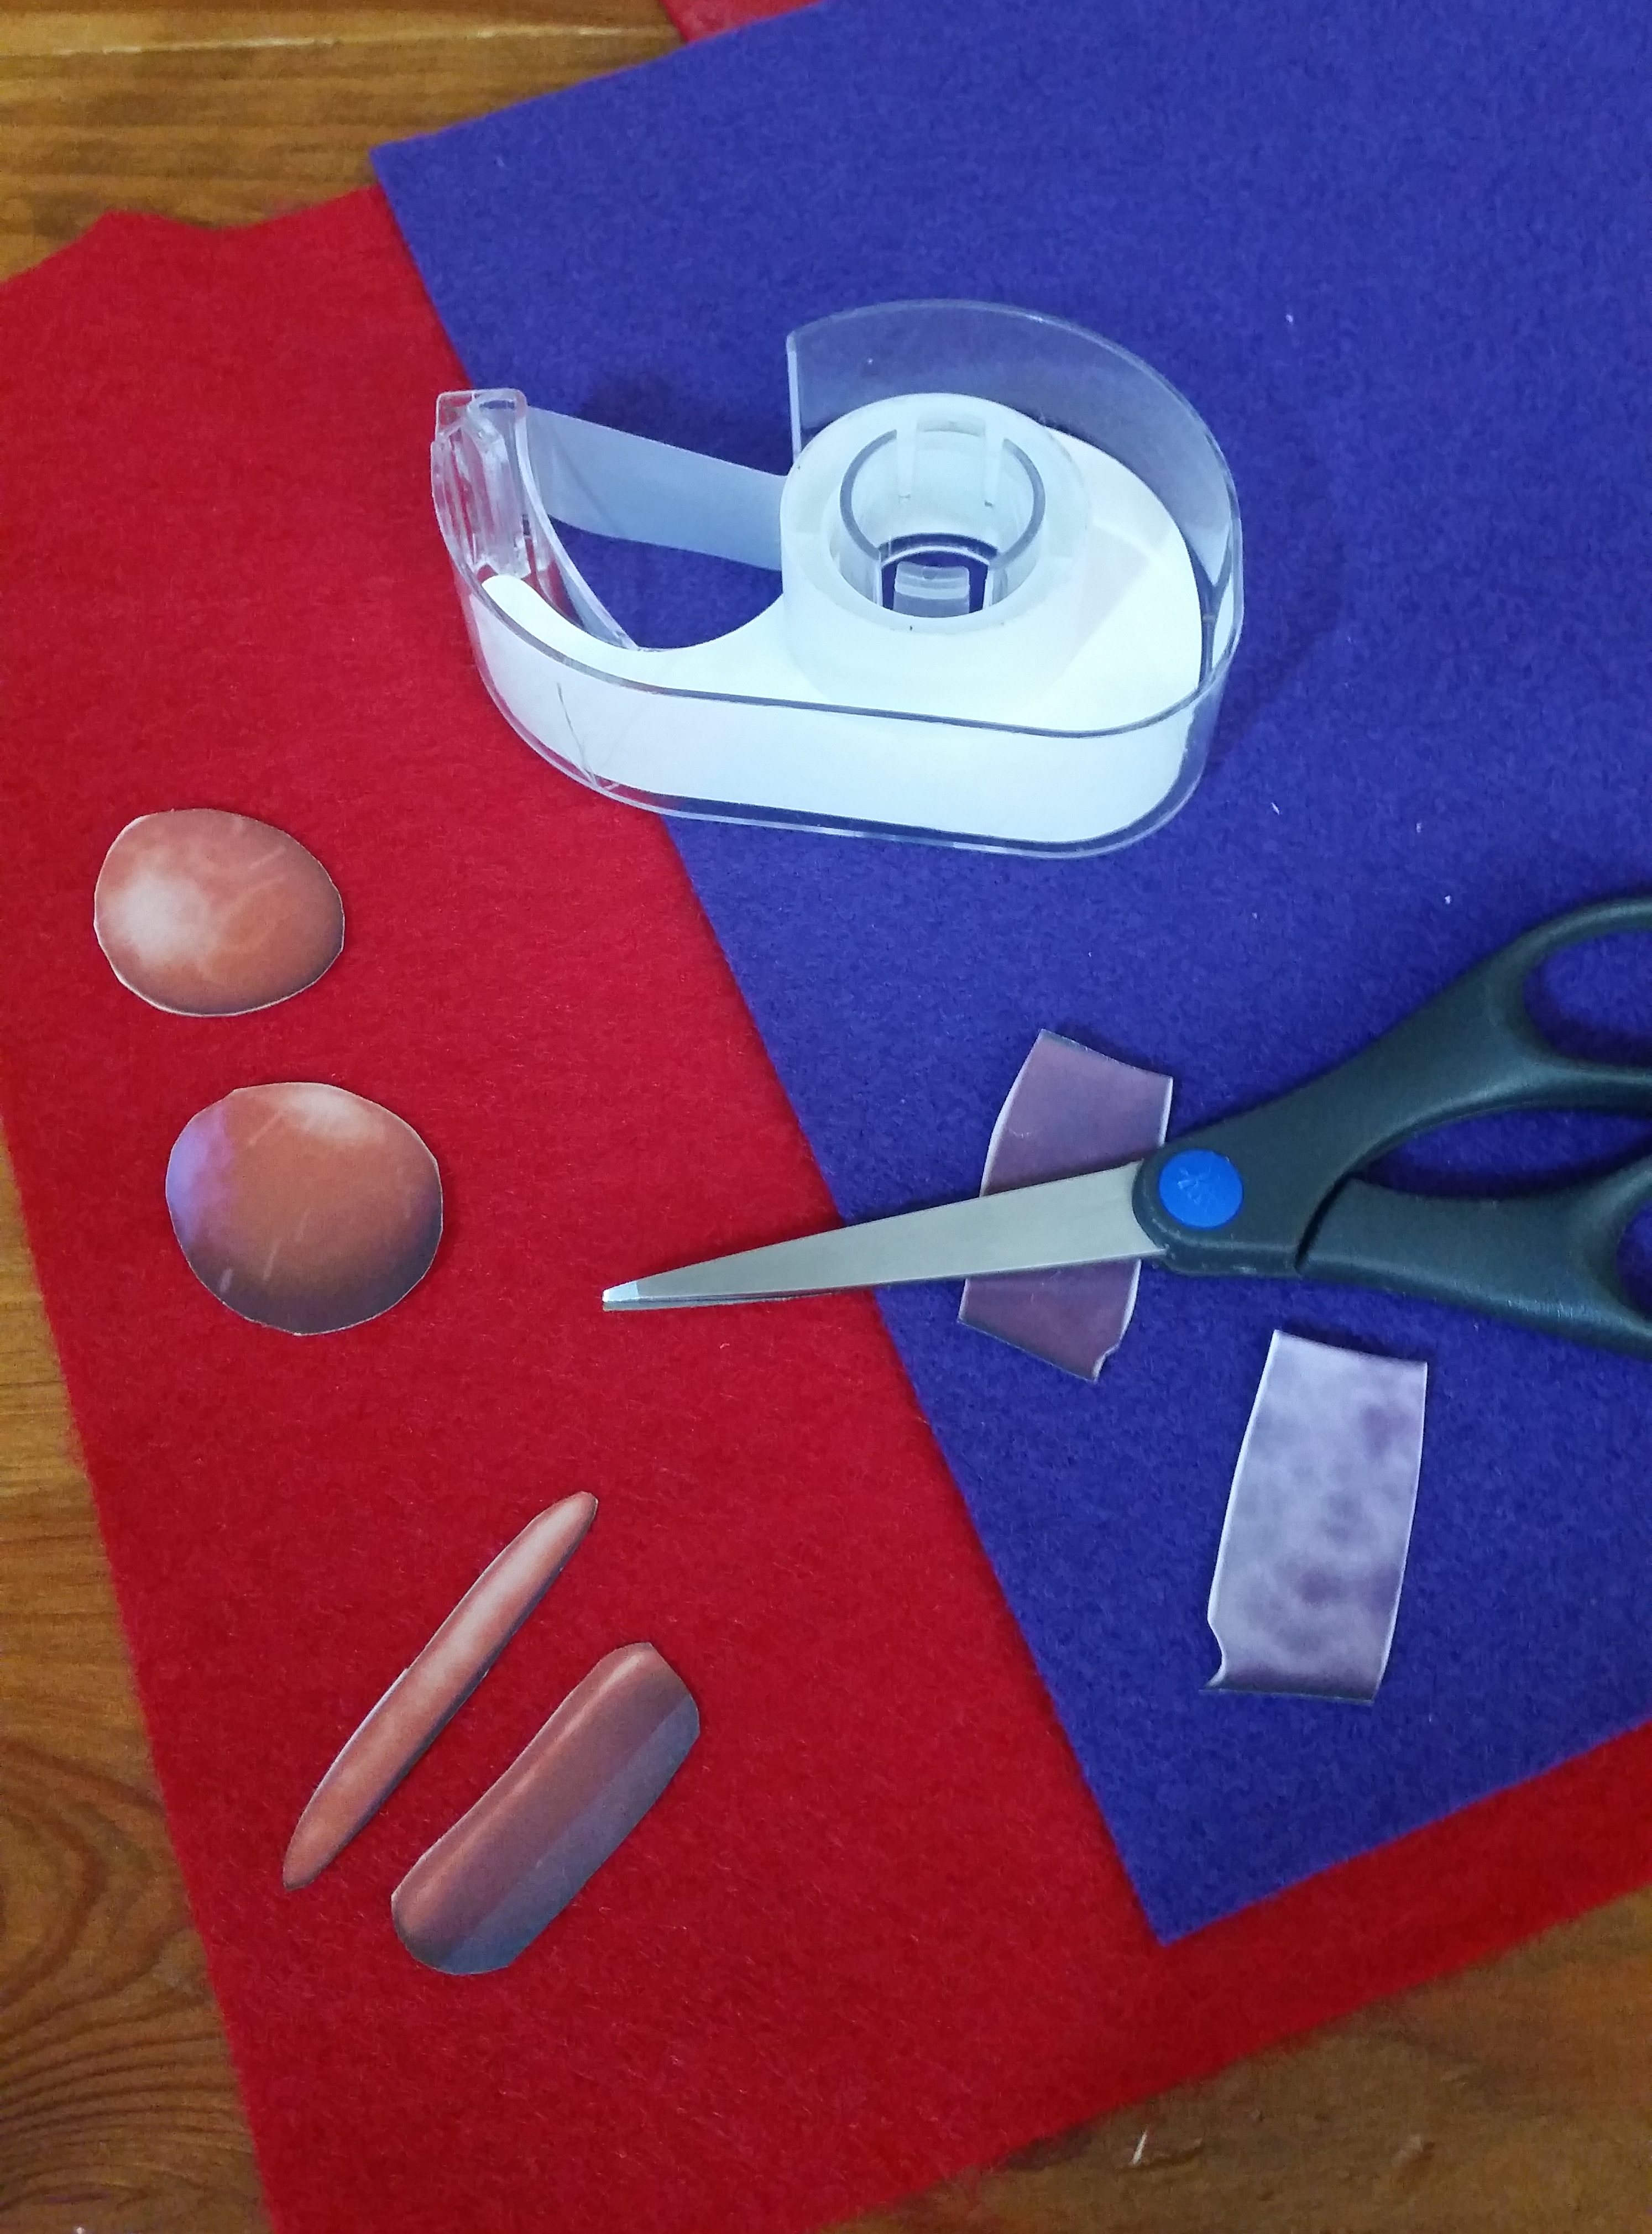
After the eyes and mouth are finished I then take the paper with the mask printed on it and cut out each of the colored areas, making a template for the red cheeks and lips as well as the purple tears. I tape these pieces to the color of felt I want to use for each piece and then cut around them. Making two tears, a bottom and lower lip and two cheeks. You will just cut these out of the felt with scissors, no need for the foam for these. You can then add them to the mask with a fabric glue.
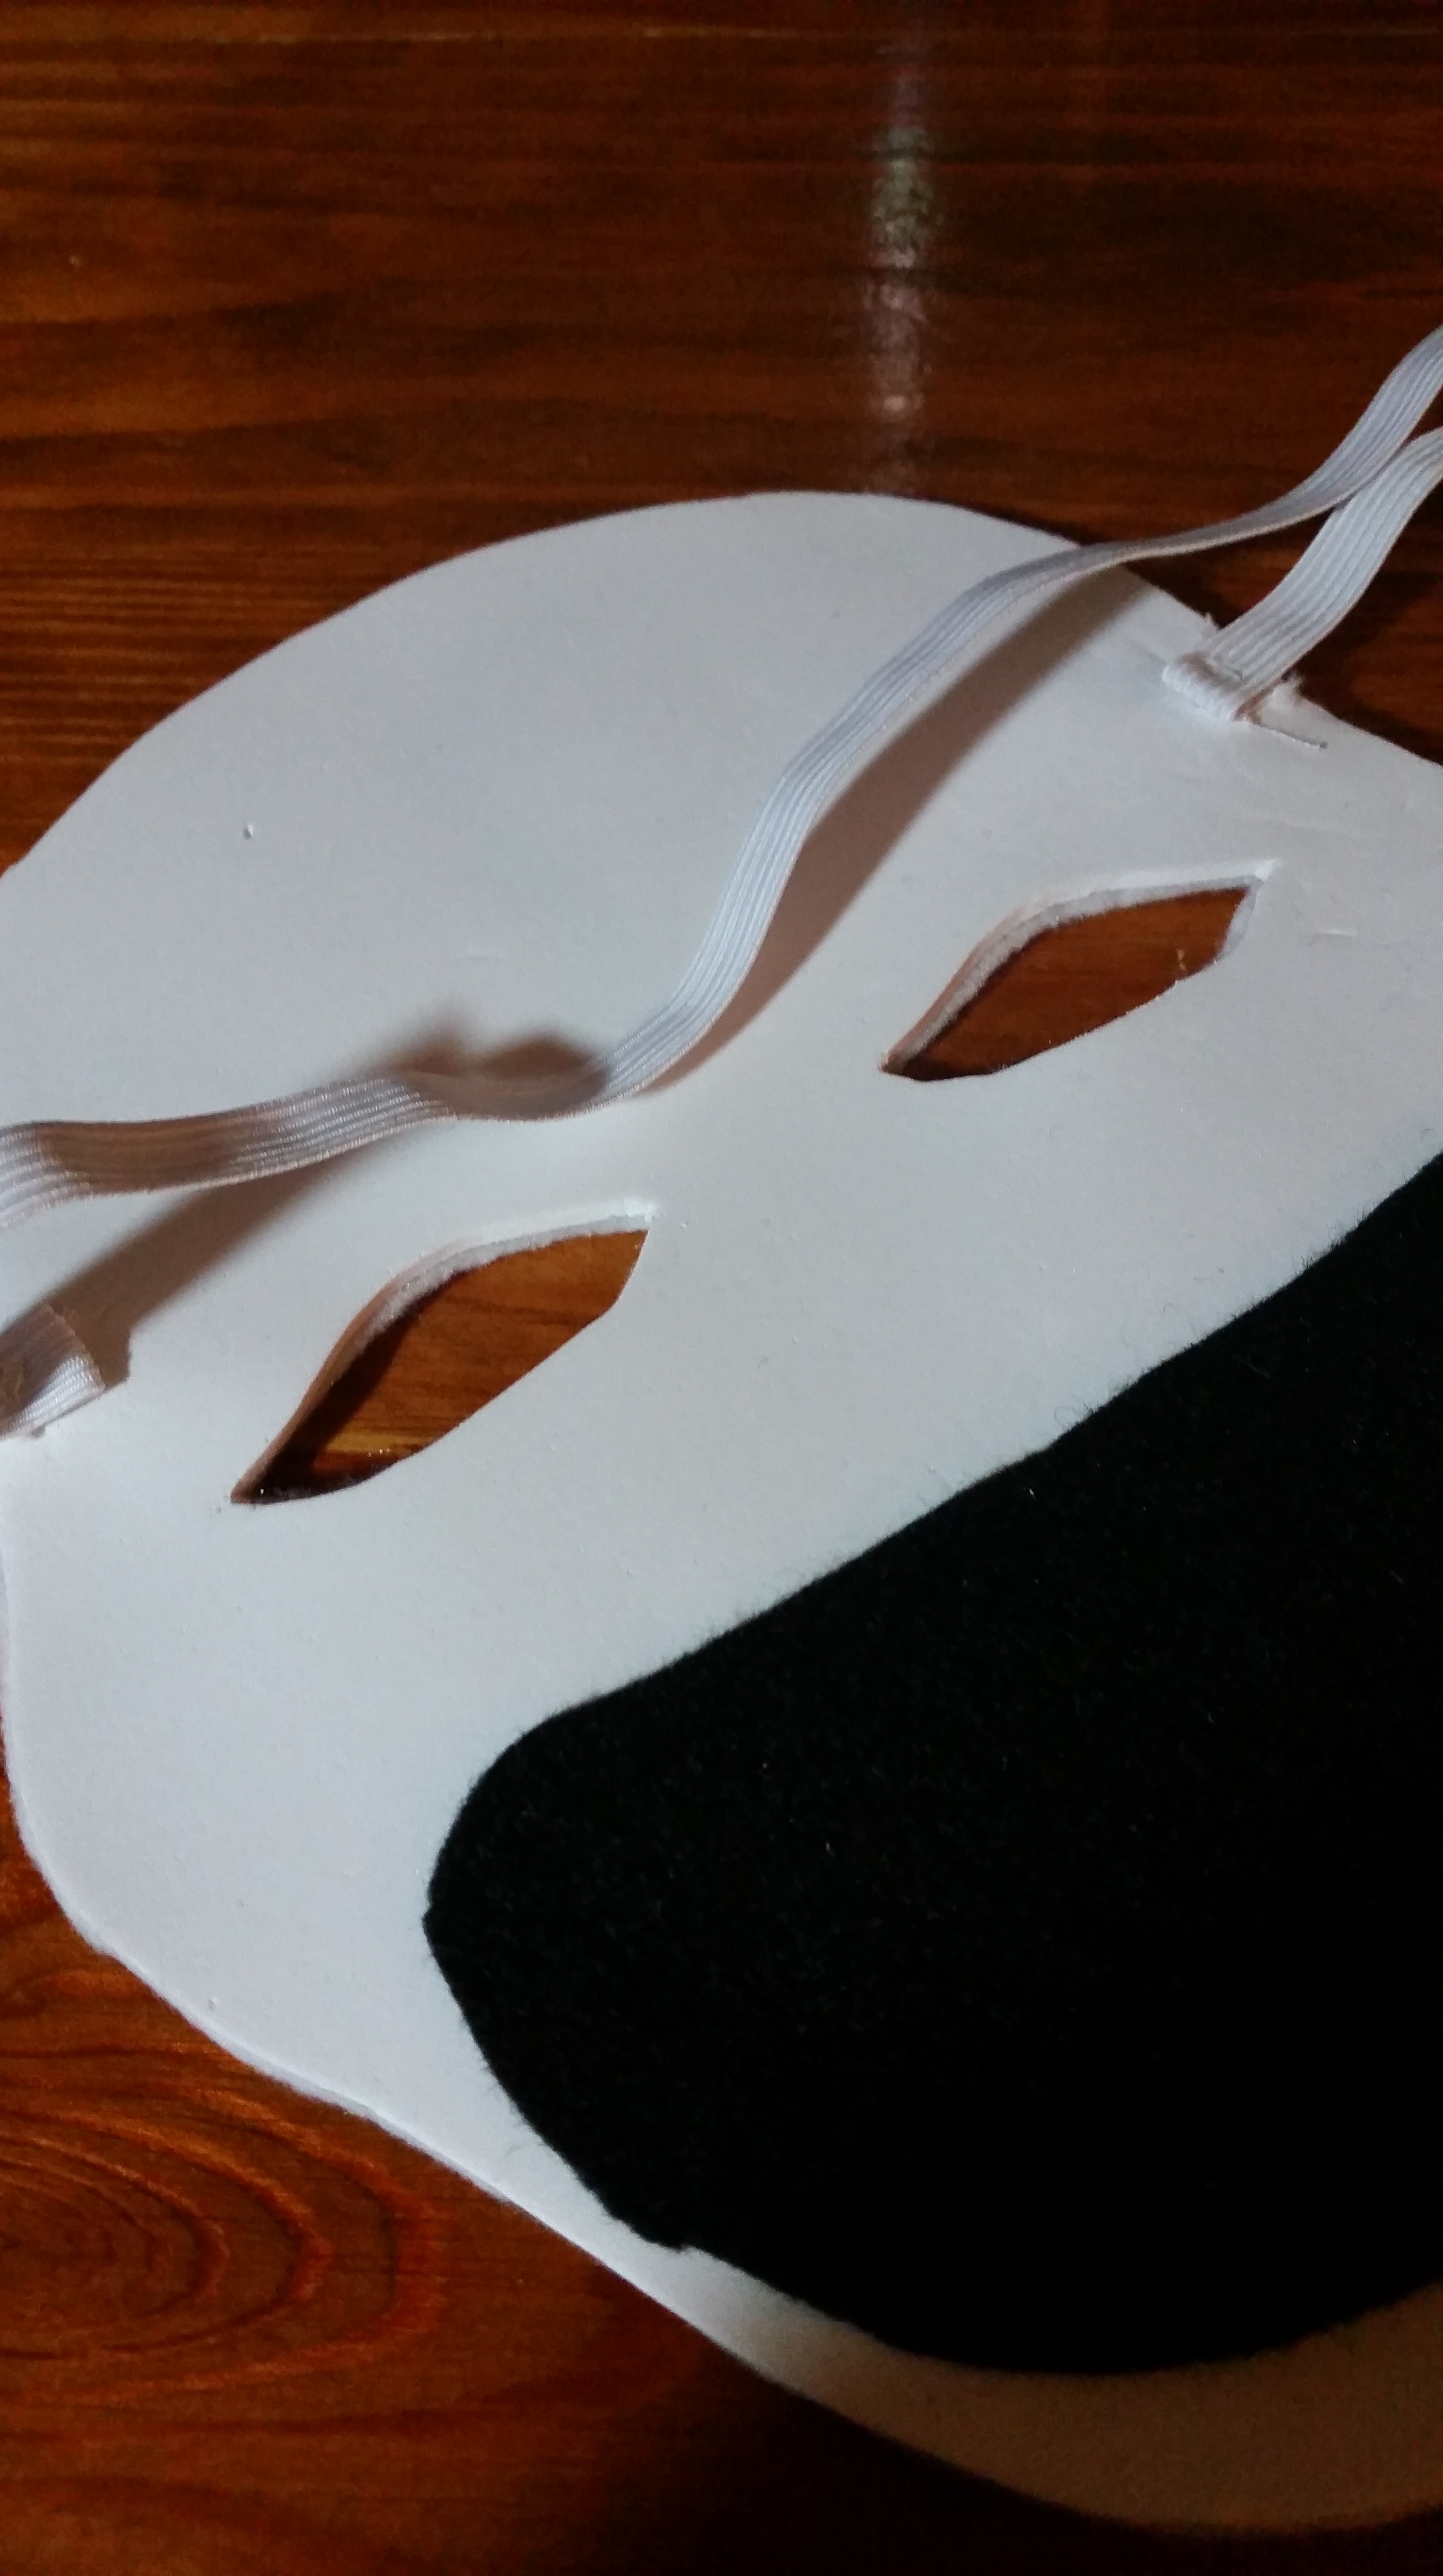
I then measure and sew a piece of elastic to the back of the foam on each side. (keep the paper or sticky side facing front) This will be the band to go around your child’s head. Then I remove the paper and attach the felt face to the foam.
I then turned my mask over and added a piece of black felt to the back of the mask so that the mouth is filled in. (if given the chance I probable would’ve added this piece to the front of the foam before adding the felt face) Doing it this way it gives the mask a bit of a 3D appearance.
You can also add some black stockings to the back of the mask over the eyes. I chose not to add the stockings so my little could still see in the dark, but this could really make it fun since the original Marionette’s eyes are completely black. This will finish off the Marionettes face.

For the rest of the costume you will need
- Black hoodie
- Black sweat pants
- White duct tape
- Felt (one sheet each of white and black)
- Foam (one sheet of white)
- Sewing needle and thread
- Scissors
For the buttons I used a kids cup as a template for the three large buttons. I cut out three buttons in felt and three in foam. I then used the end of a marker as a template for the small button holes and cut out a total of twelve of them in black foam, four for each button (The sticky backing on the black foam makes it much easier to add them to the buttons, plus it’s much less messy than glue).
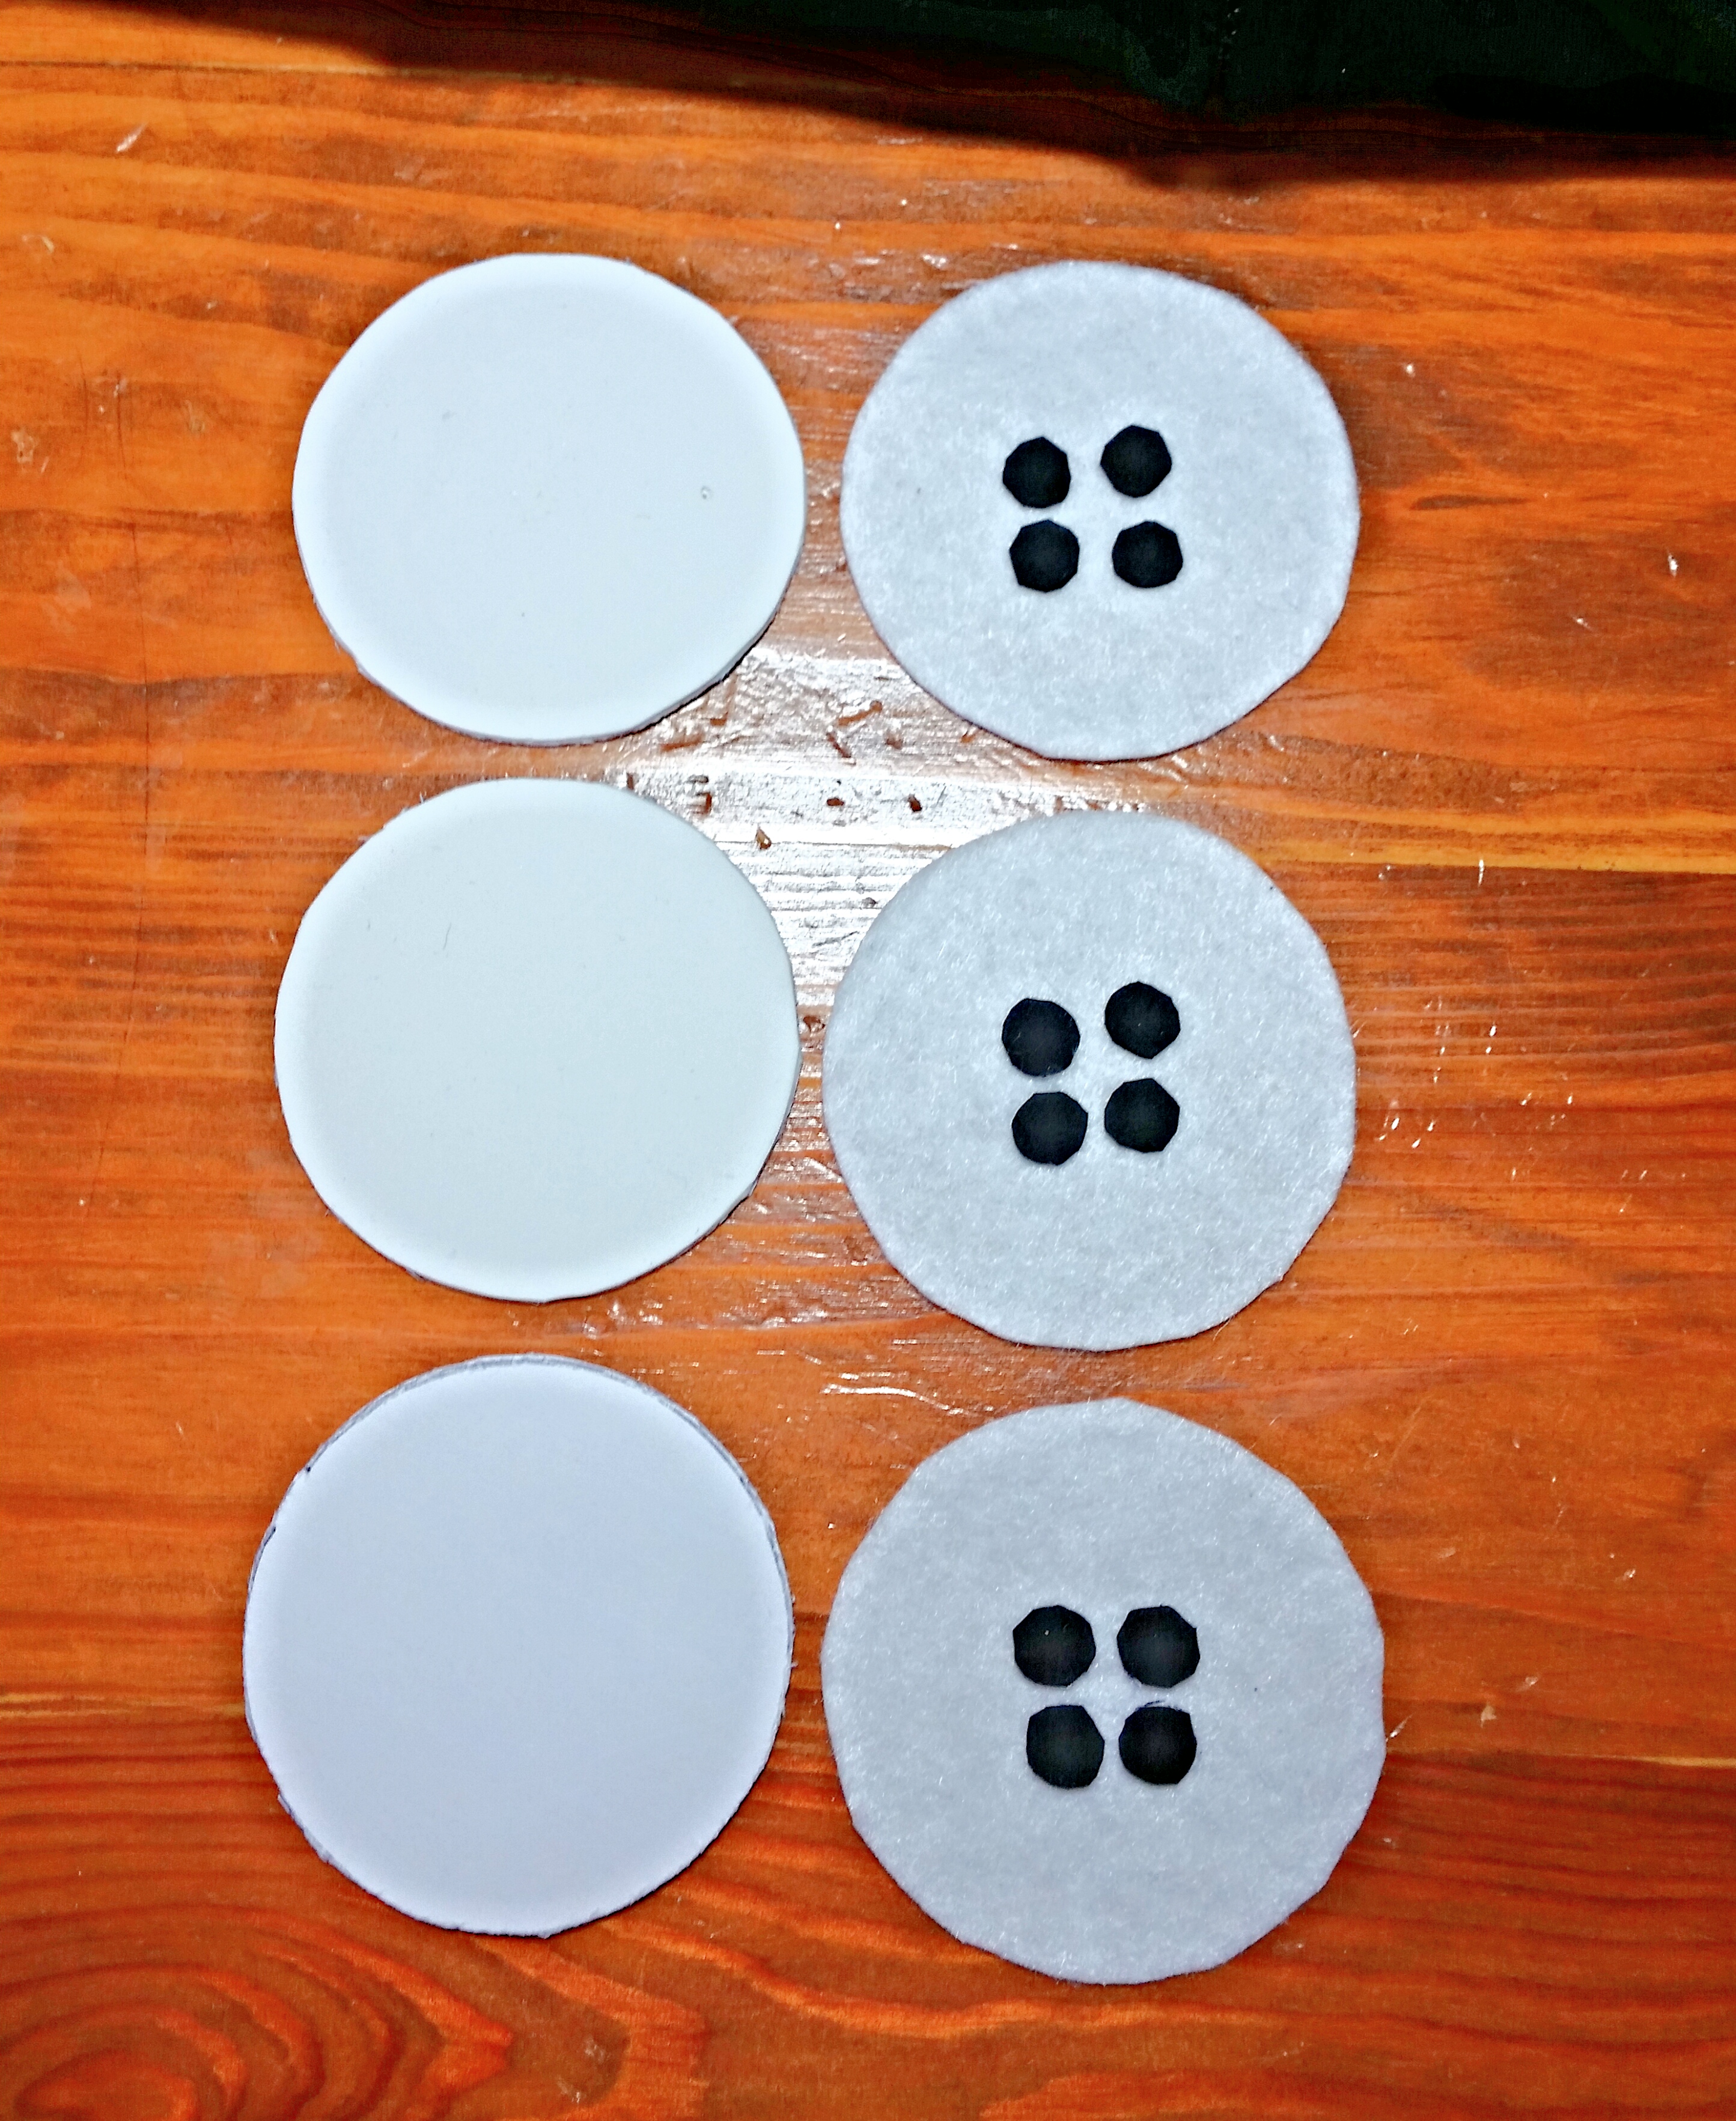
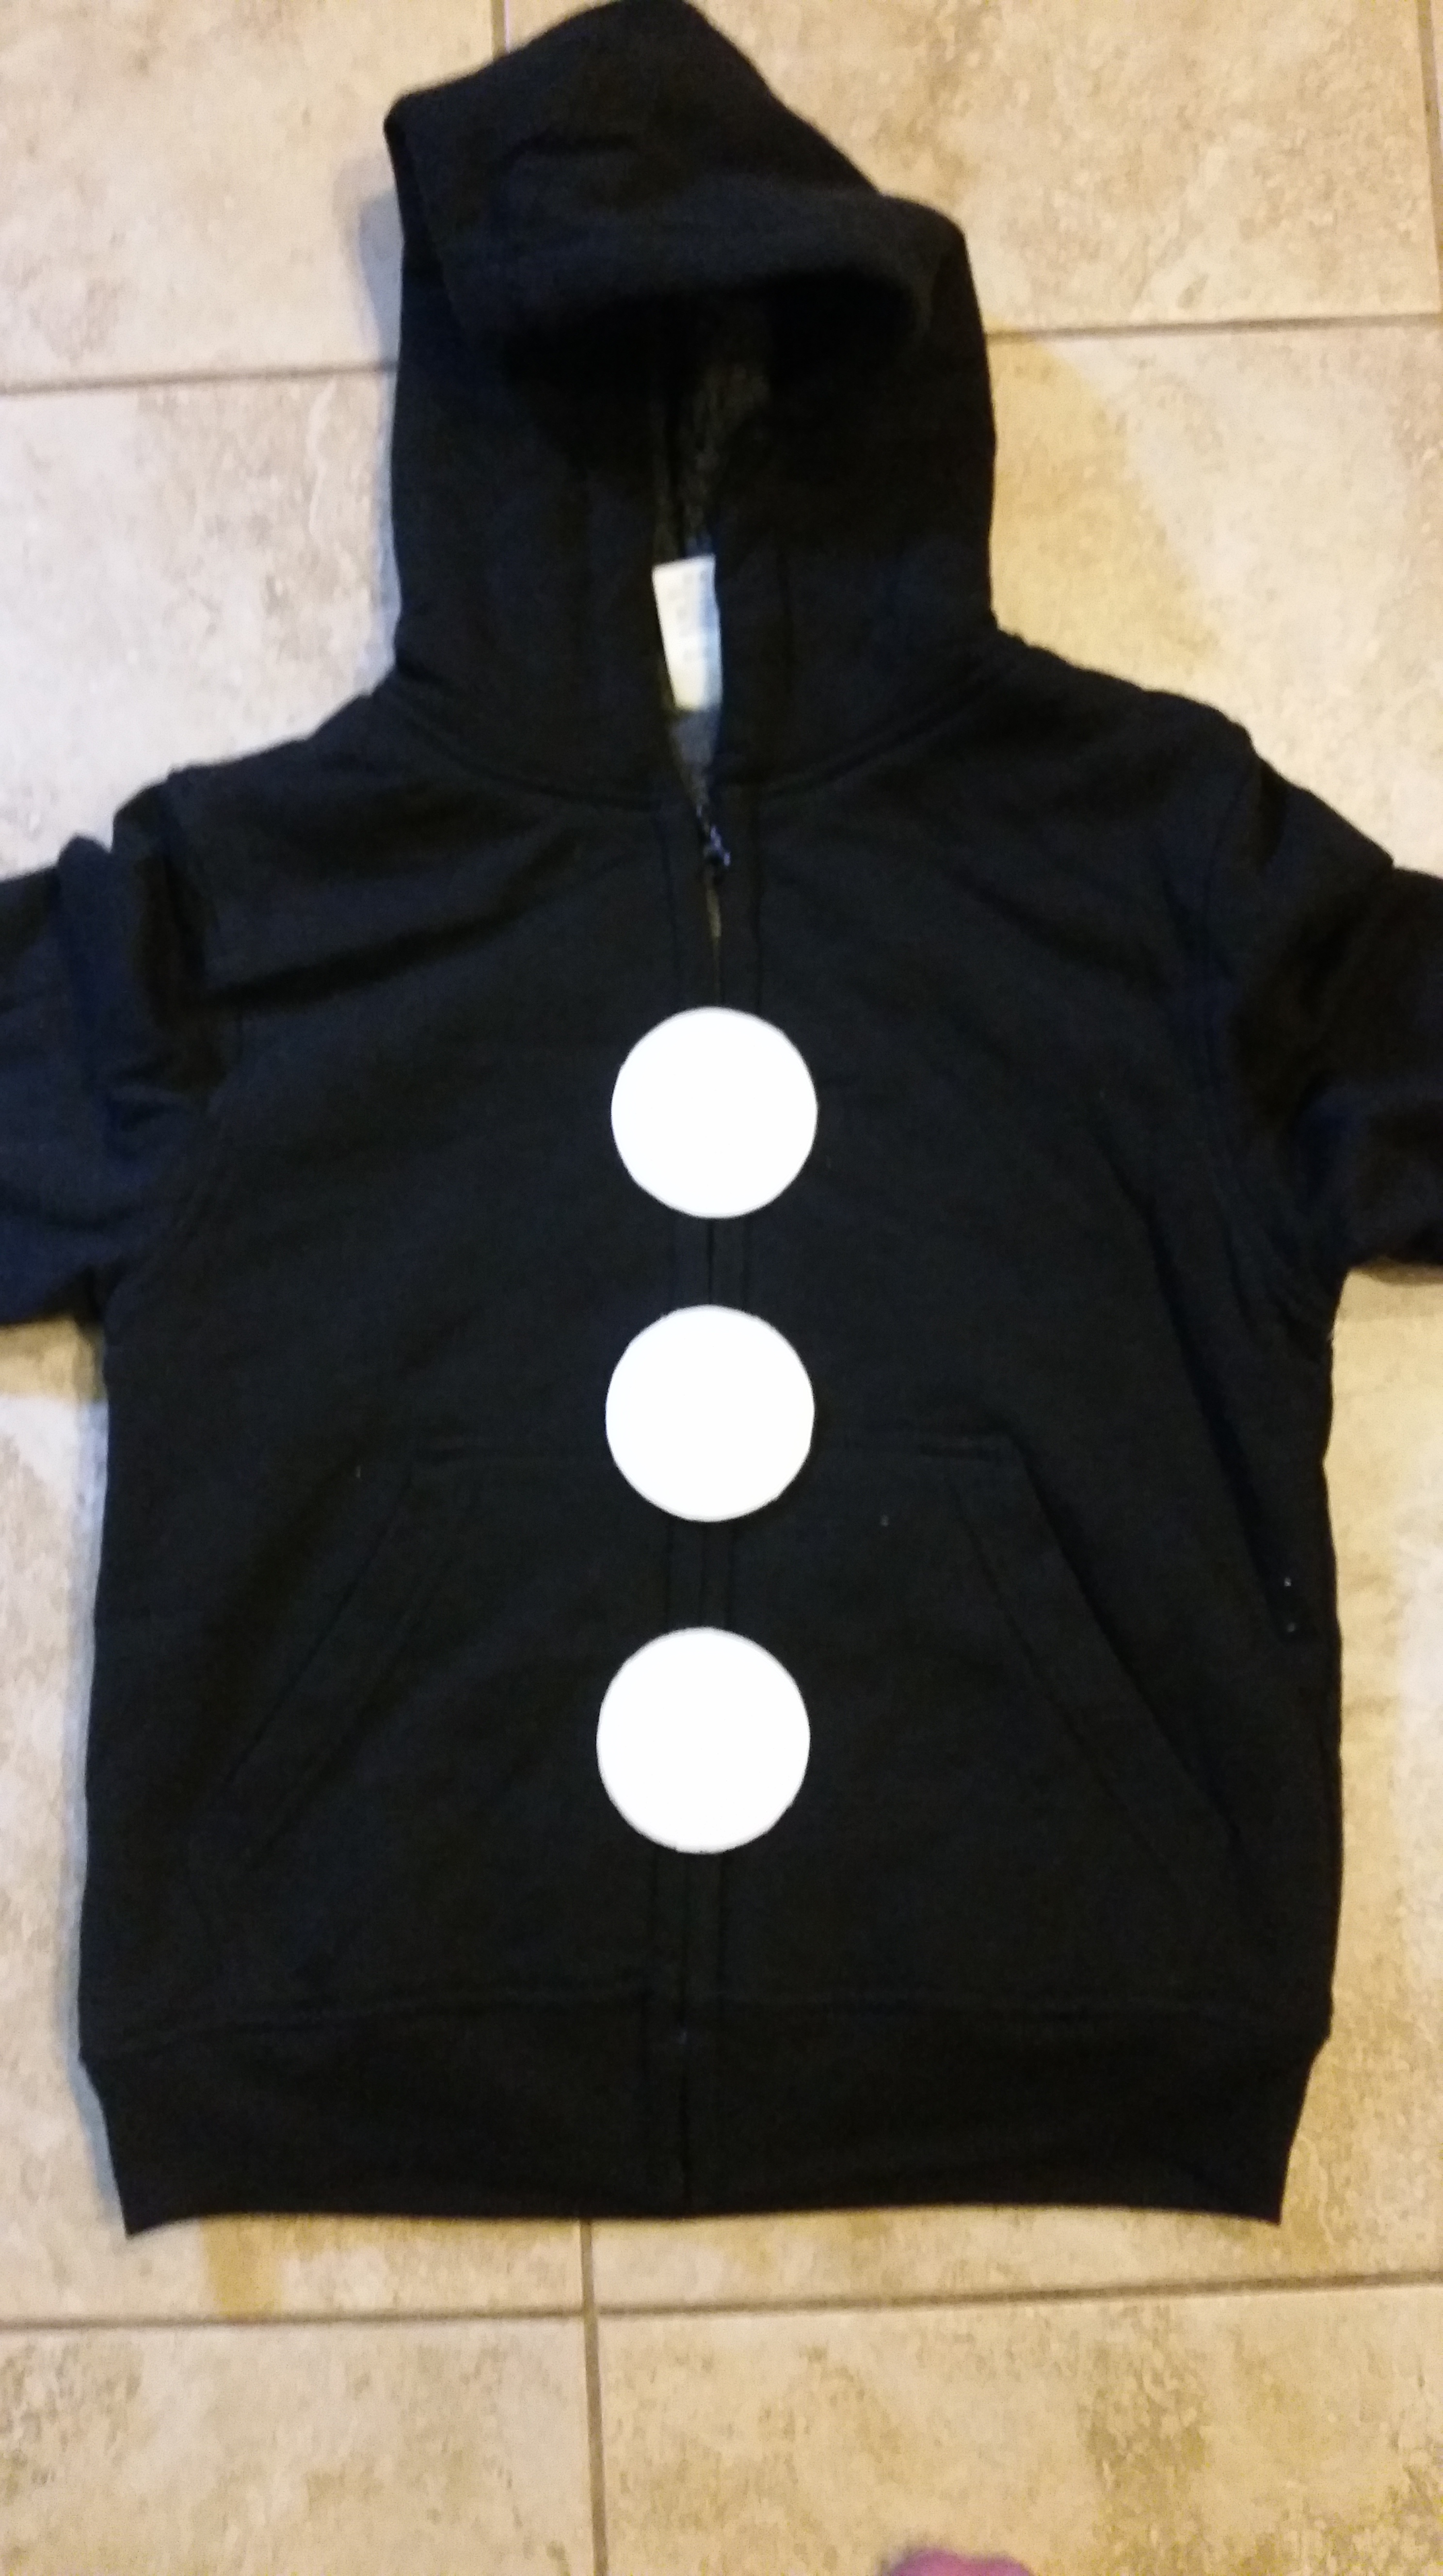
After laying out the sweatshirt I checked placement of the buttons and sewed the foam circles in place just to the side of the zipper. I then took off the paper backing and stuck the felt buttons to the front of the foam adding four small circles to each button for button holes.
To make the stripes on the arms and legs I spread out the arms of the sweatshirt and wrapped strips of duct tape around them and trimmed the tape so the seam wasn’t visible.
I did the same thing to the sweatpants as well. Laying them out flat I wrapped them with strips of duct tape to mimic the lines on the arms and legs of the Marionette.

Now my littlest has his very own unique costume for Halloween. If you create your own Marionette, please come over and share them with me on Facebook or Instagram. I’d love to see what you create.

