
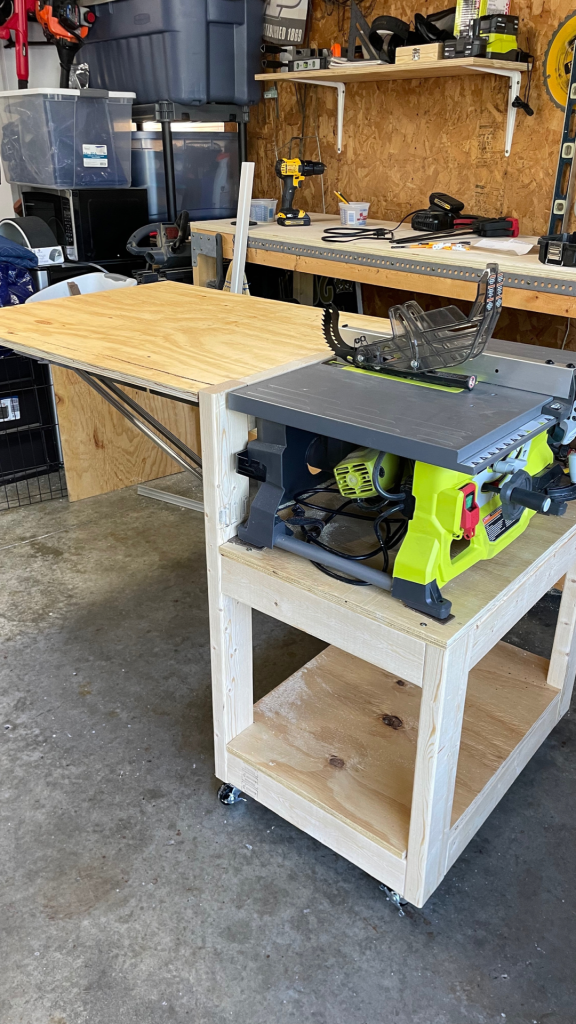

I bought a new Ryobi table saw for myself and have been struggling with how to work with it safely on my own. I really needed a table with an out feed and locking wheels so I can move it out of the way when not using it, mostly because I am limited on space. So I looked around for plans and couldn’t find one that I liked 100%. But there is so much inspiration out there, just scroll through Pinterest and you are bombarded with ideas. So I sat down with a paper and pencil and started working on my own plan. After adding the collapsible shelves to my Miter Saw Table I had to find a way to work them into my plan and I am so happy with the finished product. I can even slide it up to my Miter Saw Table and use the center of it for an extra table surface to work with if my boards are extra wide.
Disclosure: This post may contain affiliate links. Meaning I get a commission if you decide to purchase through my links, through no cost to you.
Tools
- circular saw
- straight edge (I used a 8ft 2×4)
- Kreg Jig for pocket holes (could also use long wood screws to assemble)
- drill
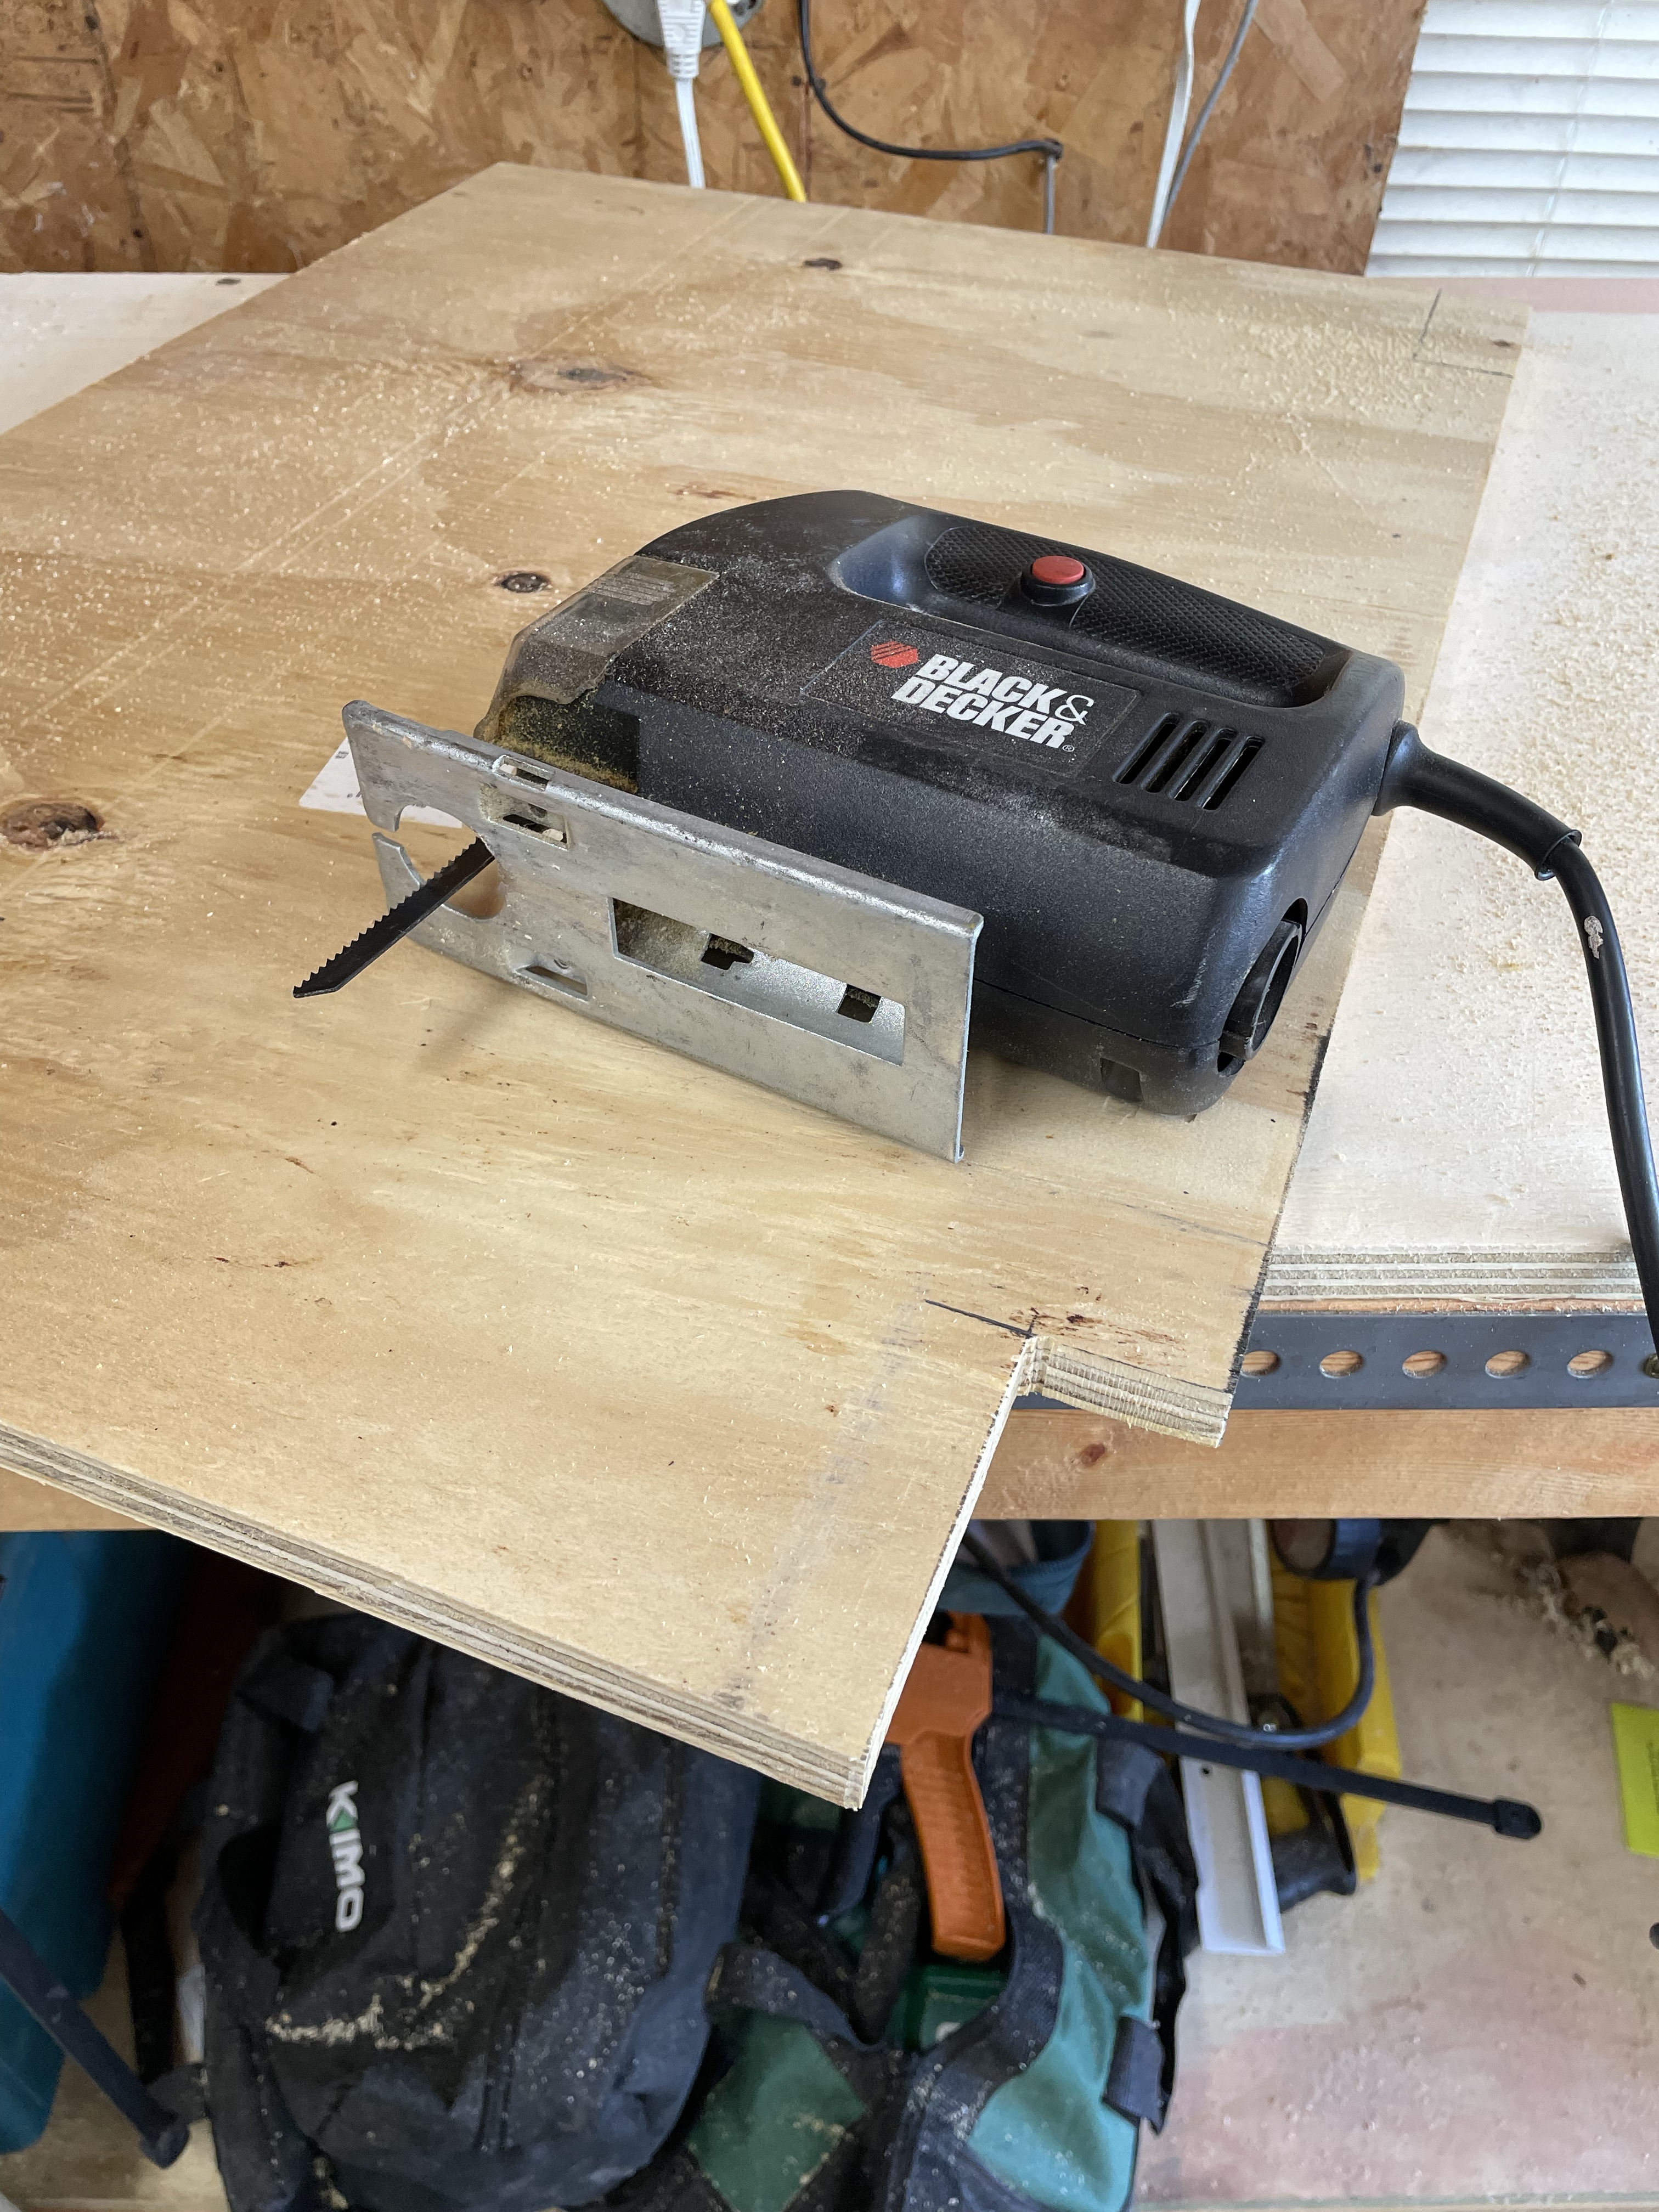
- jig saw or multi tool
- clamps
Materials
- 4 8 foot long 2x4s (I used construction grade)
- 1 sheet of plywood or mdf (I used plywood sheathing and there is extra left over for other projects)
- 2″ pocket hole screws
- 1 1/4″ wood screws
- 2 24″ folding shelf brackets
- 4 2″ locking casters/wheels
Cut List
For my Ryobi 13 Amp 8-1/4 in Table Saw that measures 11.25″ tall, 17″ deep and 28″ wide I cut the plywood into three pieces with plenty of wood left over for future projects. Make sure to measure your saw so that you have the perfect fit for your table saw and make any adjustments that you need.
I cut two pieces at 28″ by 20″ for the two shelves and one at 28″ by 36″ for the collapsible out feed table.
I then cut my 2x4s.
- 2 at 34″
- 5 at 21″
- 2 at 22″
- 4 at 17″
I added pocket holes to both ends of the 21″ pieces as well as the 17″ pieces. and then began assembly. I highly recommend pocket holes. I made mine with a pretty basic Kreg Jig, but you can also get longer wood screws and assemble this with them.
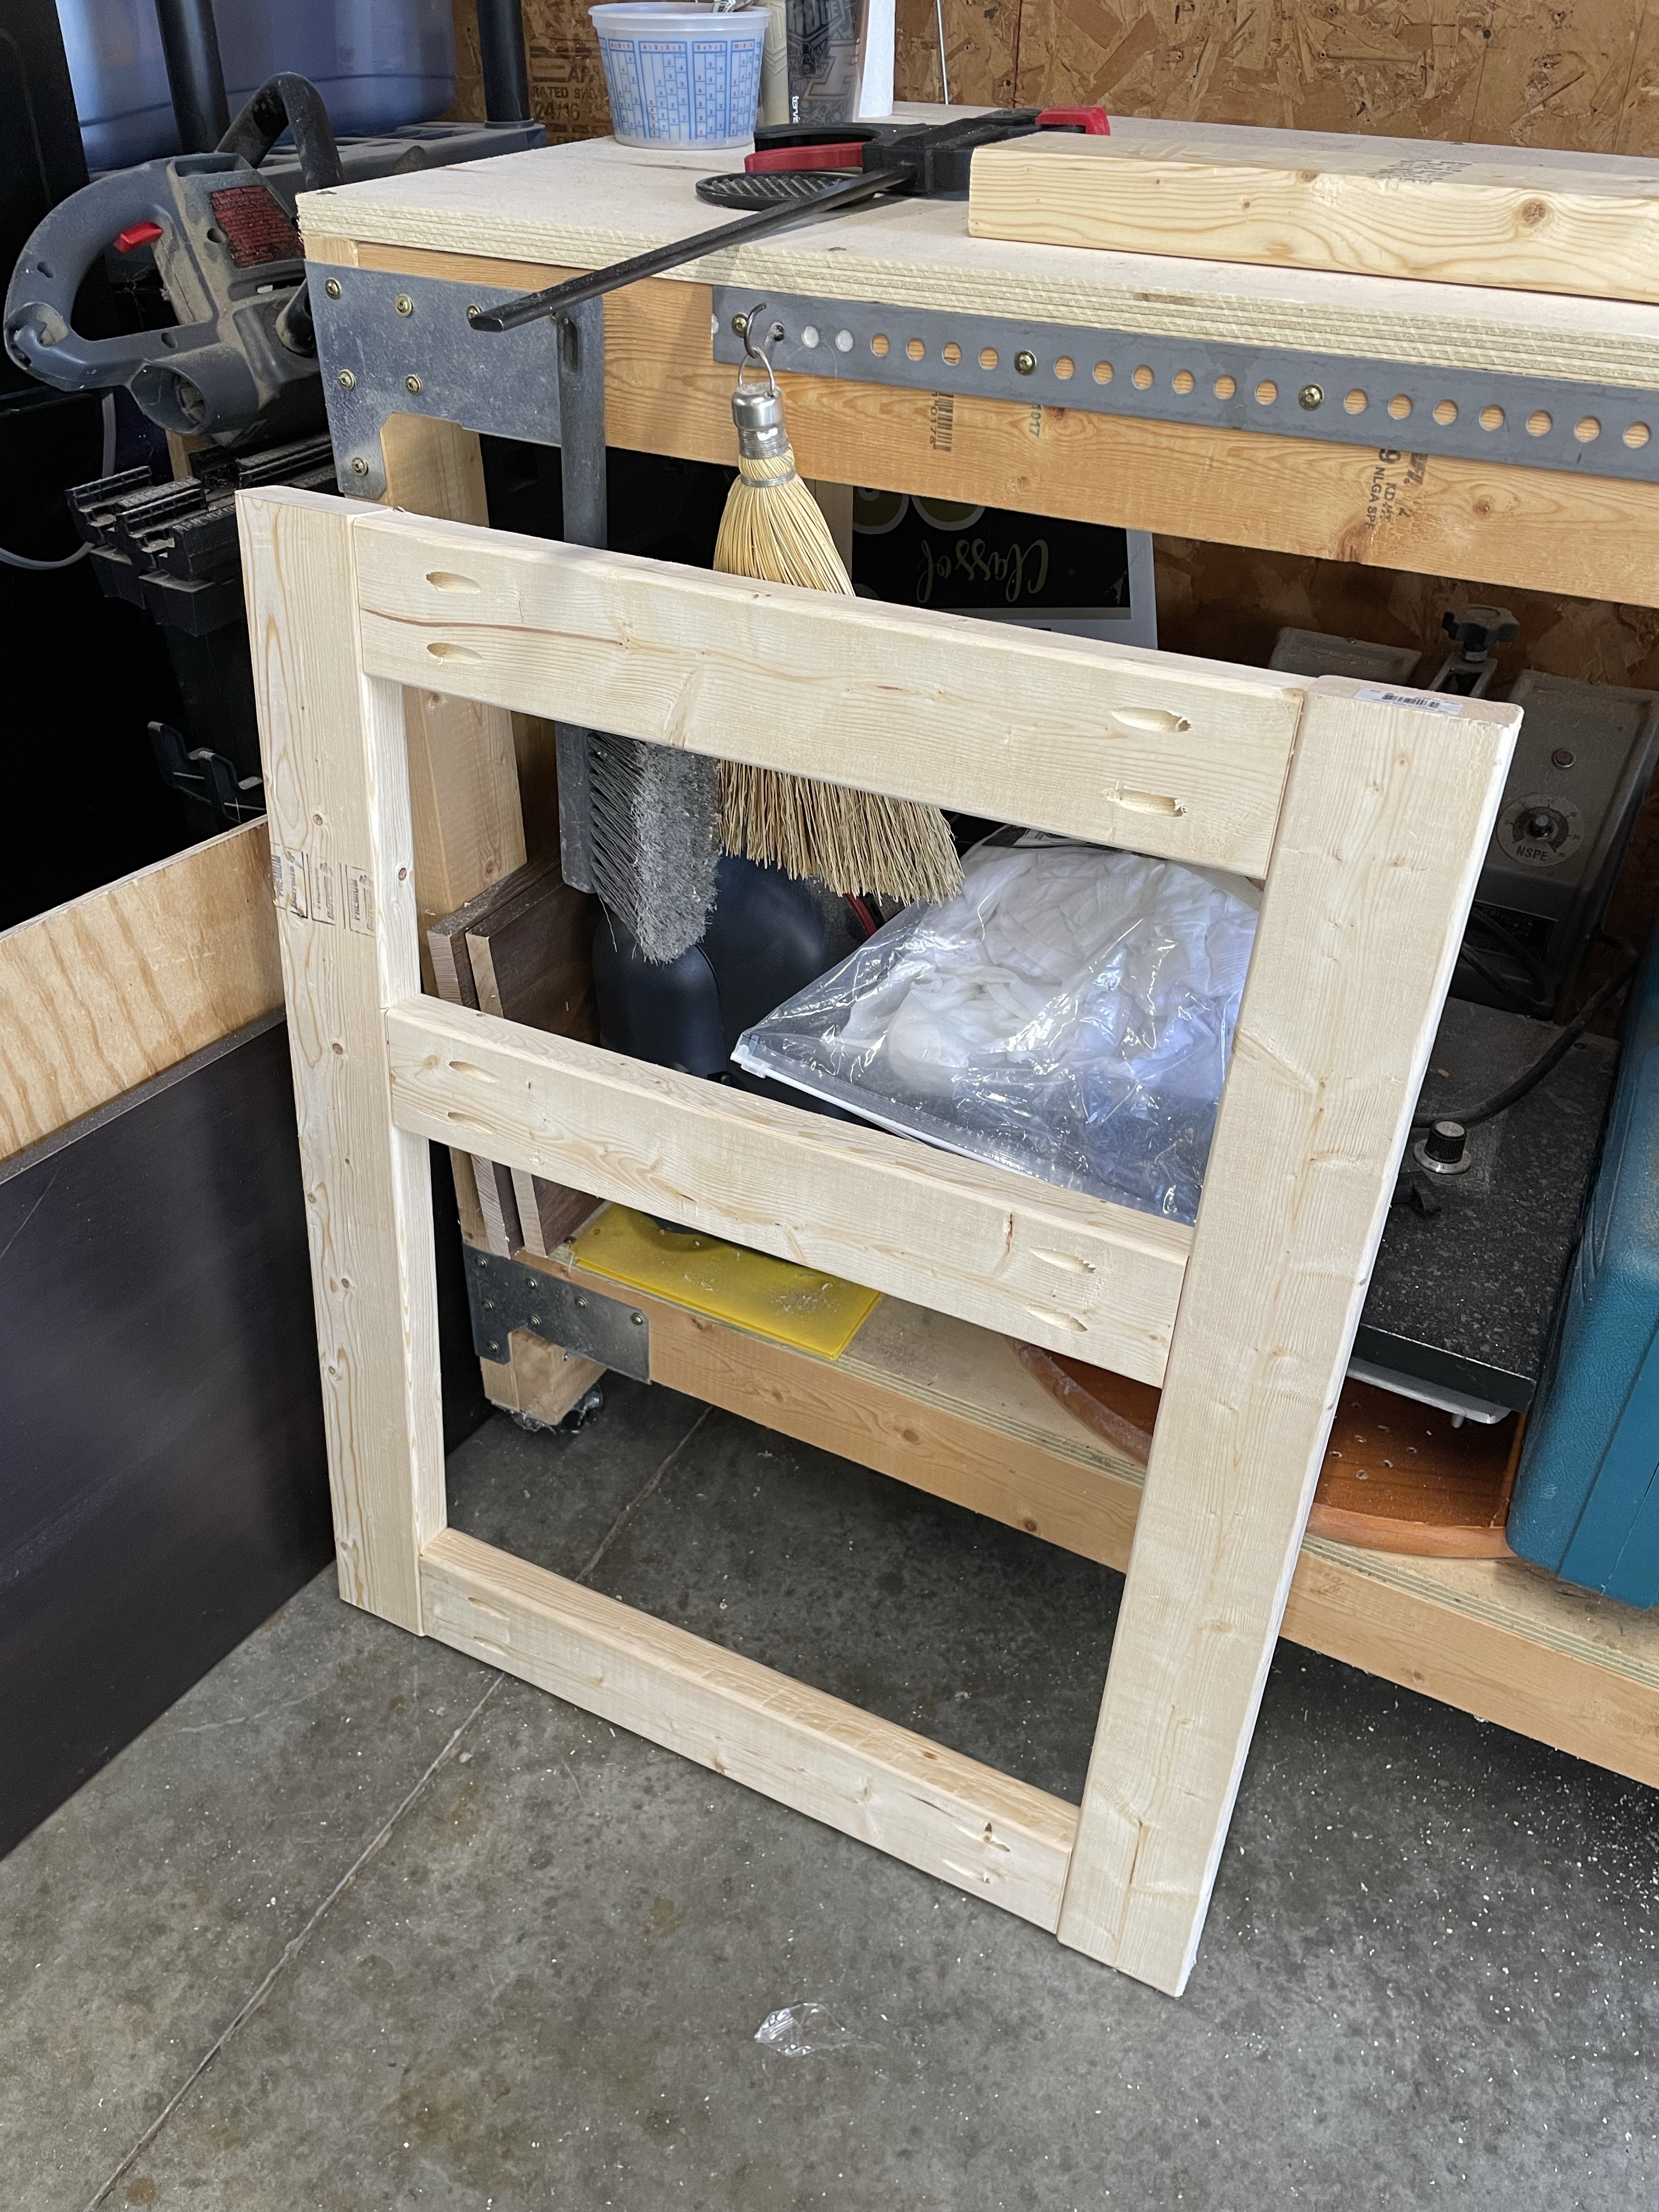
I started with side one, or the tallest piece that you will attach your out feed table to at the end. This piece is put together with your two 34″ pieces and three of your 21″ pieces. I started by adding the top and bottom. I used clamps to hold the pieces together and make sure that everything is lined up really well. Then I measured the height of my saw which is 11.25″ and added the width of my plywood which is 3/4″ and then marked a spot at 12″ down from the top of this piece. This is where I added the third/center 21″ piece, which will be the supports for my shelf.

This will be where the top shelf sits so make sure it is level across. I used a square to check that all of my corners were square and then moved on to side 2.

Side 2 is assembled just like Side 1, but you don’t have a middle piece because the top shelf will sit on the top of this piece.
Now that you have both Side 1 and 2 together it’s time to assemble the rest of the frame. This is a bit tricky but I was able to hold everything down with random clamps so the boards stayed lined up and square.

I started with adding my four 21″ pieces to Side 2, lining them up with the 2x4s at the top and bottom of the piece.

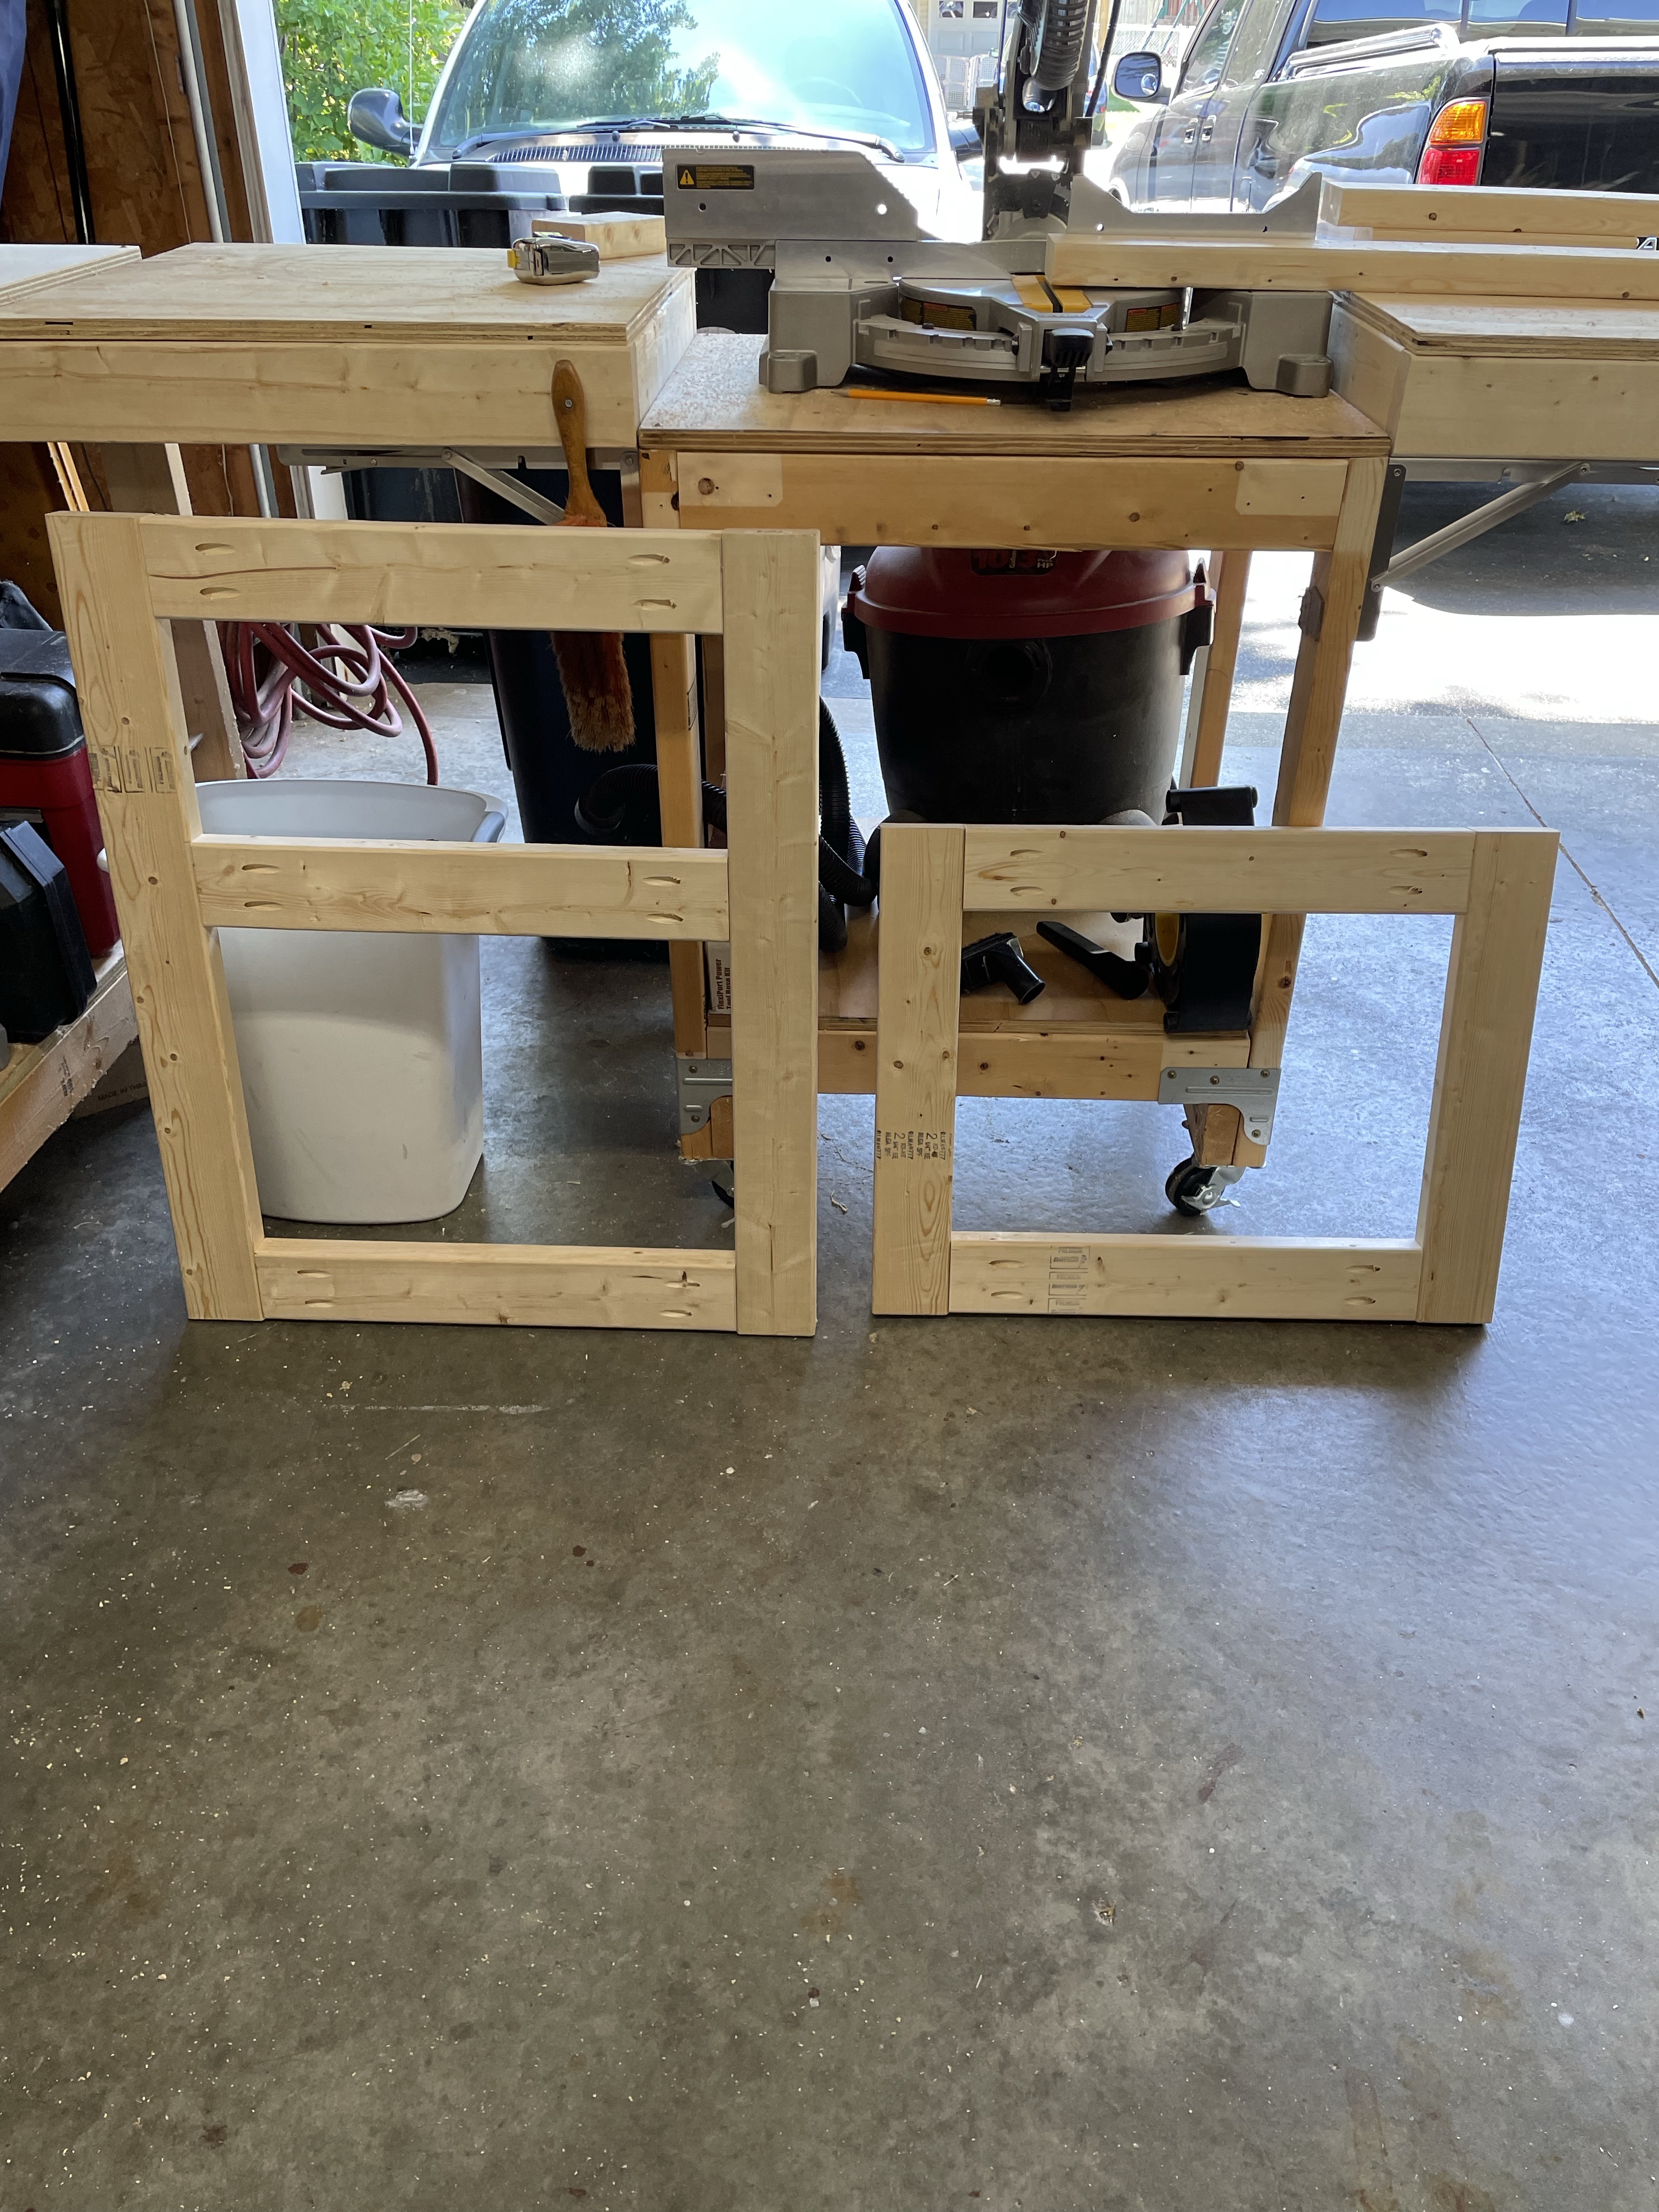
Once they were attached I put Side 1 down on the workbench and put Side 2 on top of it with the 21″ pieces lined up with the bottom and the shelf support. I had to use lots of clamps and a square to make sure that everything stayed square.

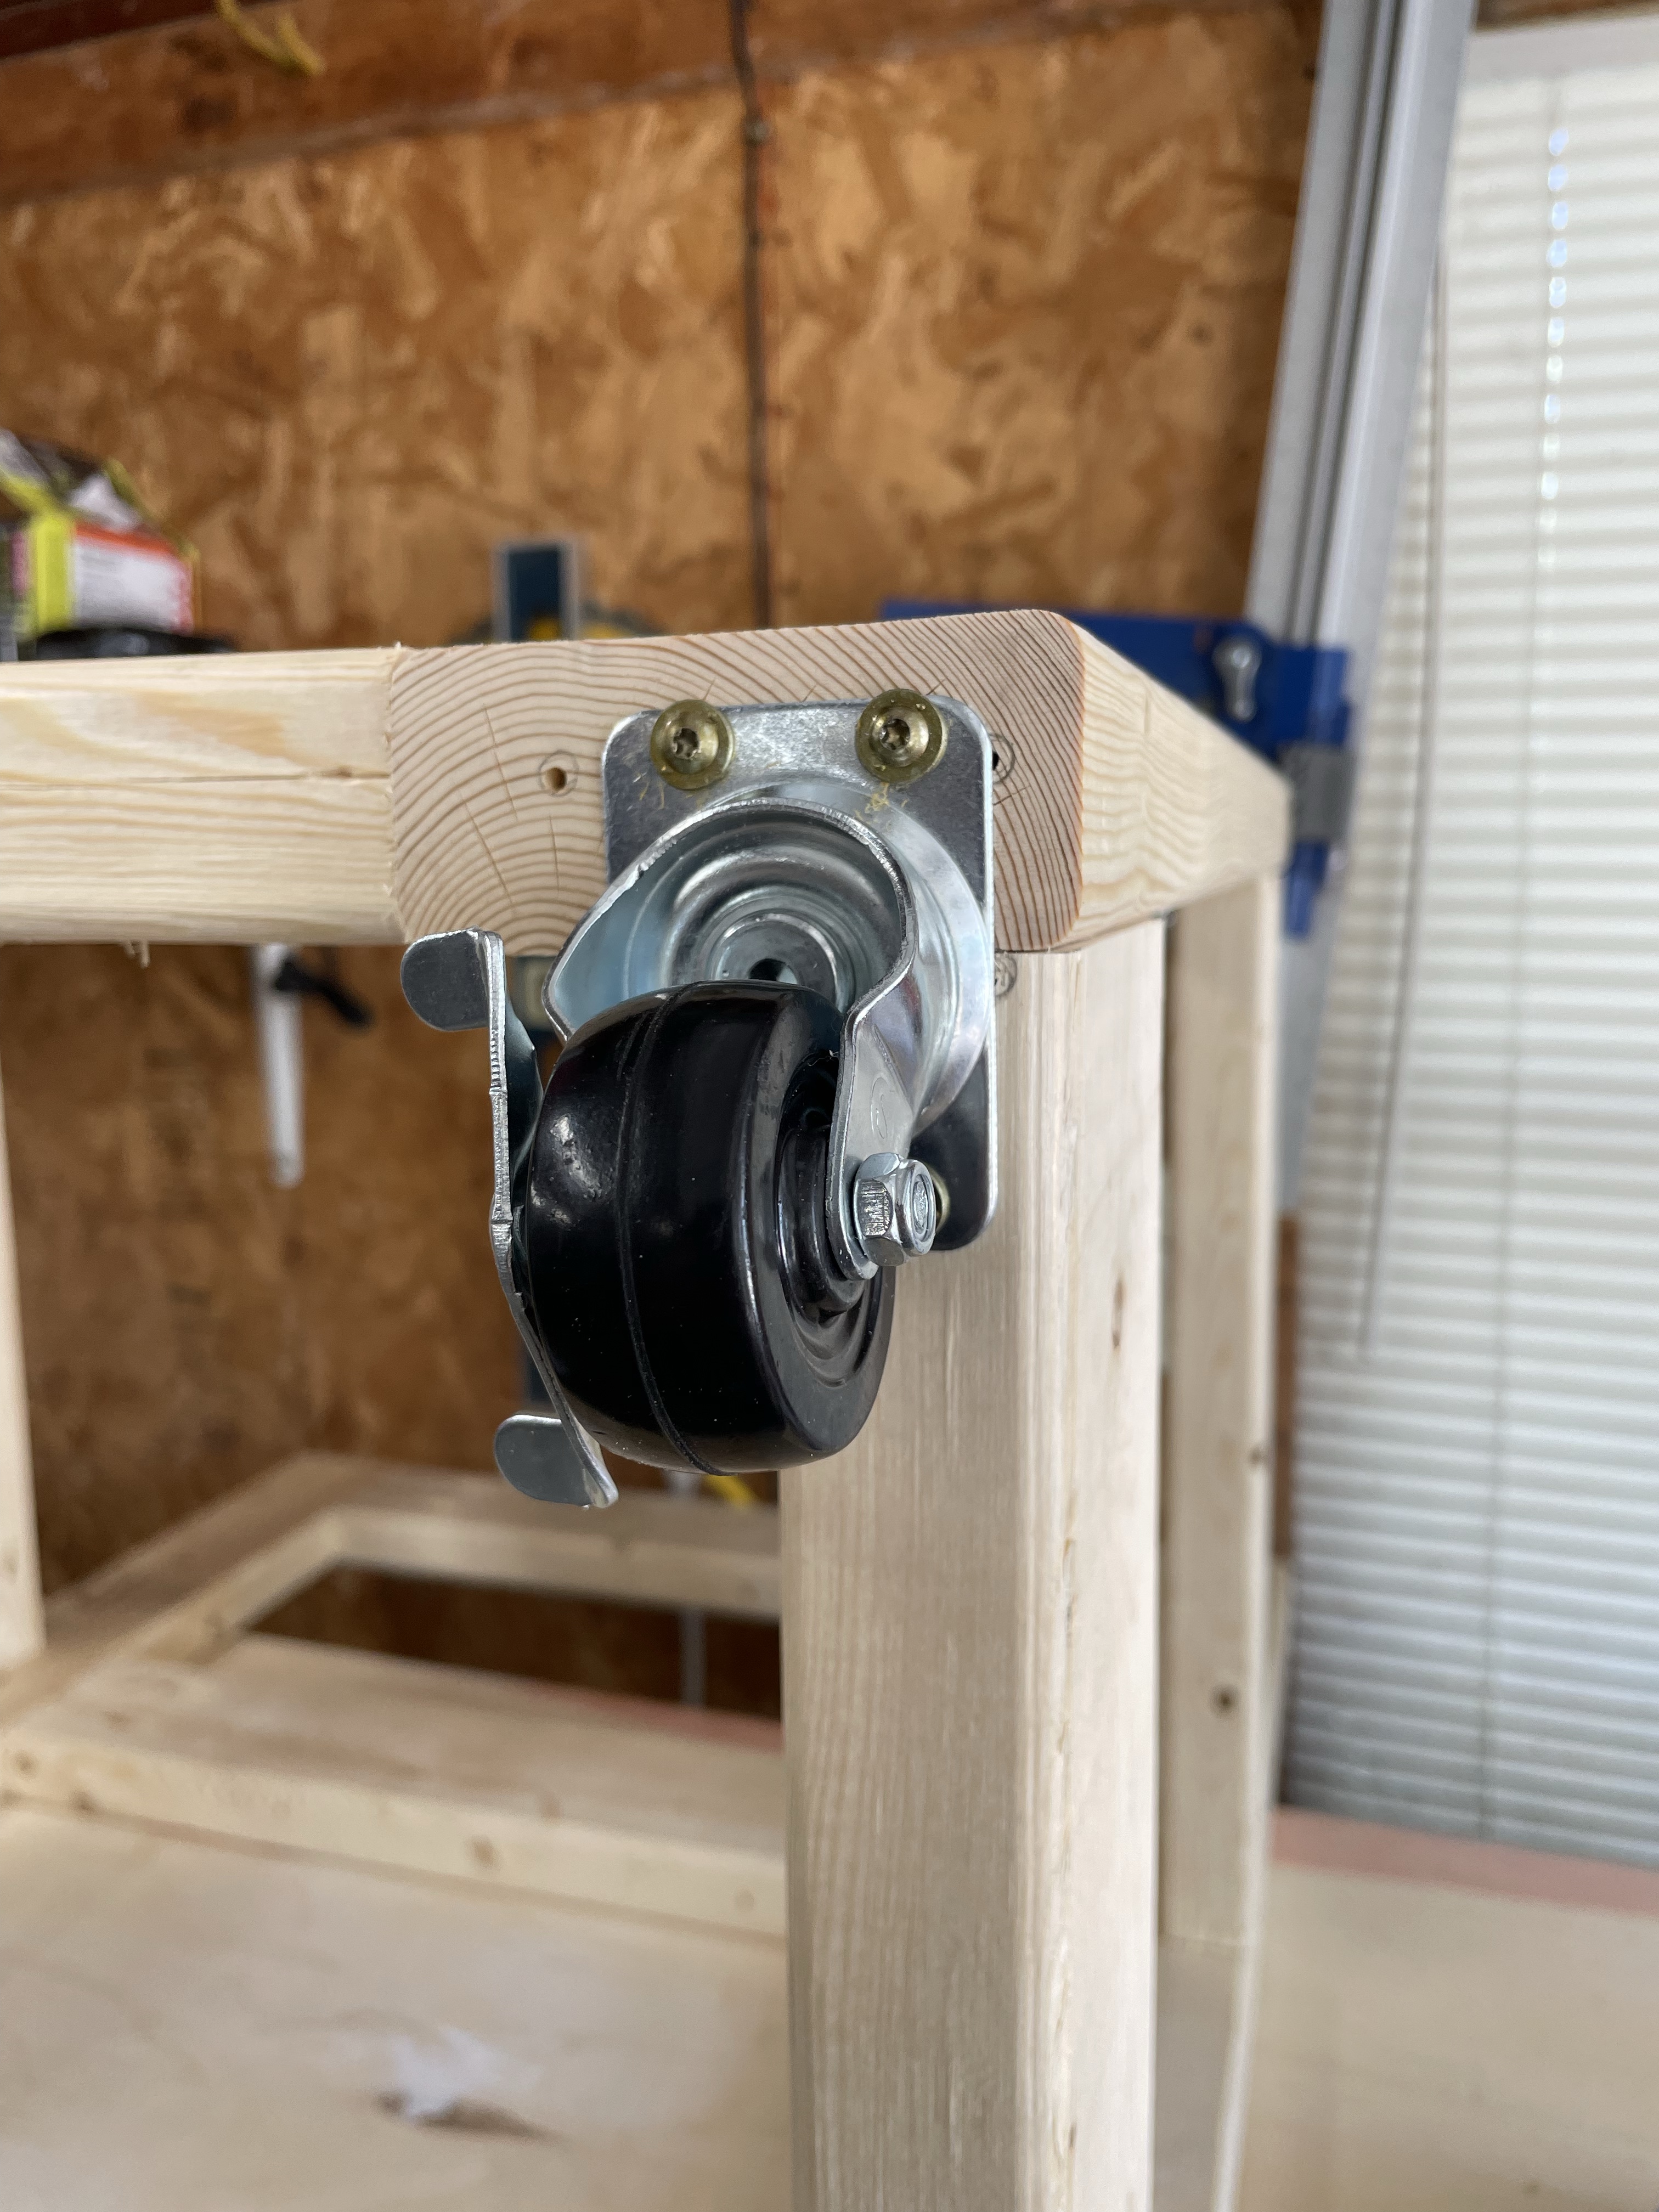
This is how it looks assembled. While it is up on the workbench I decided to add the locking casters to the bottom. I used wood screws to secure them.

Now it is time to add the shelves. You will need to mark two corners on the top shelf and all four corners on the bottom shelf. To do this I used a scrap piece of 2×4 and drew out the areas to cut and then cut them with a jig saw (you could probably use a multi-tool for this as well).

Now you just need to put your bottom shelf in. It takes some finagling but it should fit in the space really well if you cut the corners correctly. My bottom shelf was so snug that I didn’t bother with screws. I doubt it will move unless you use a hammer, or maybe a battering ram.
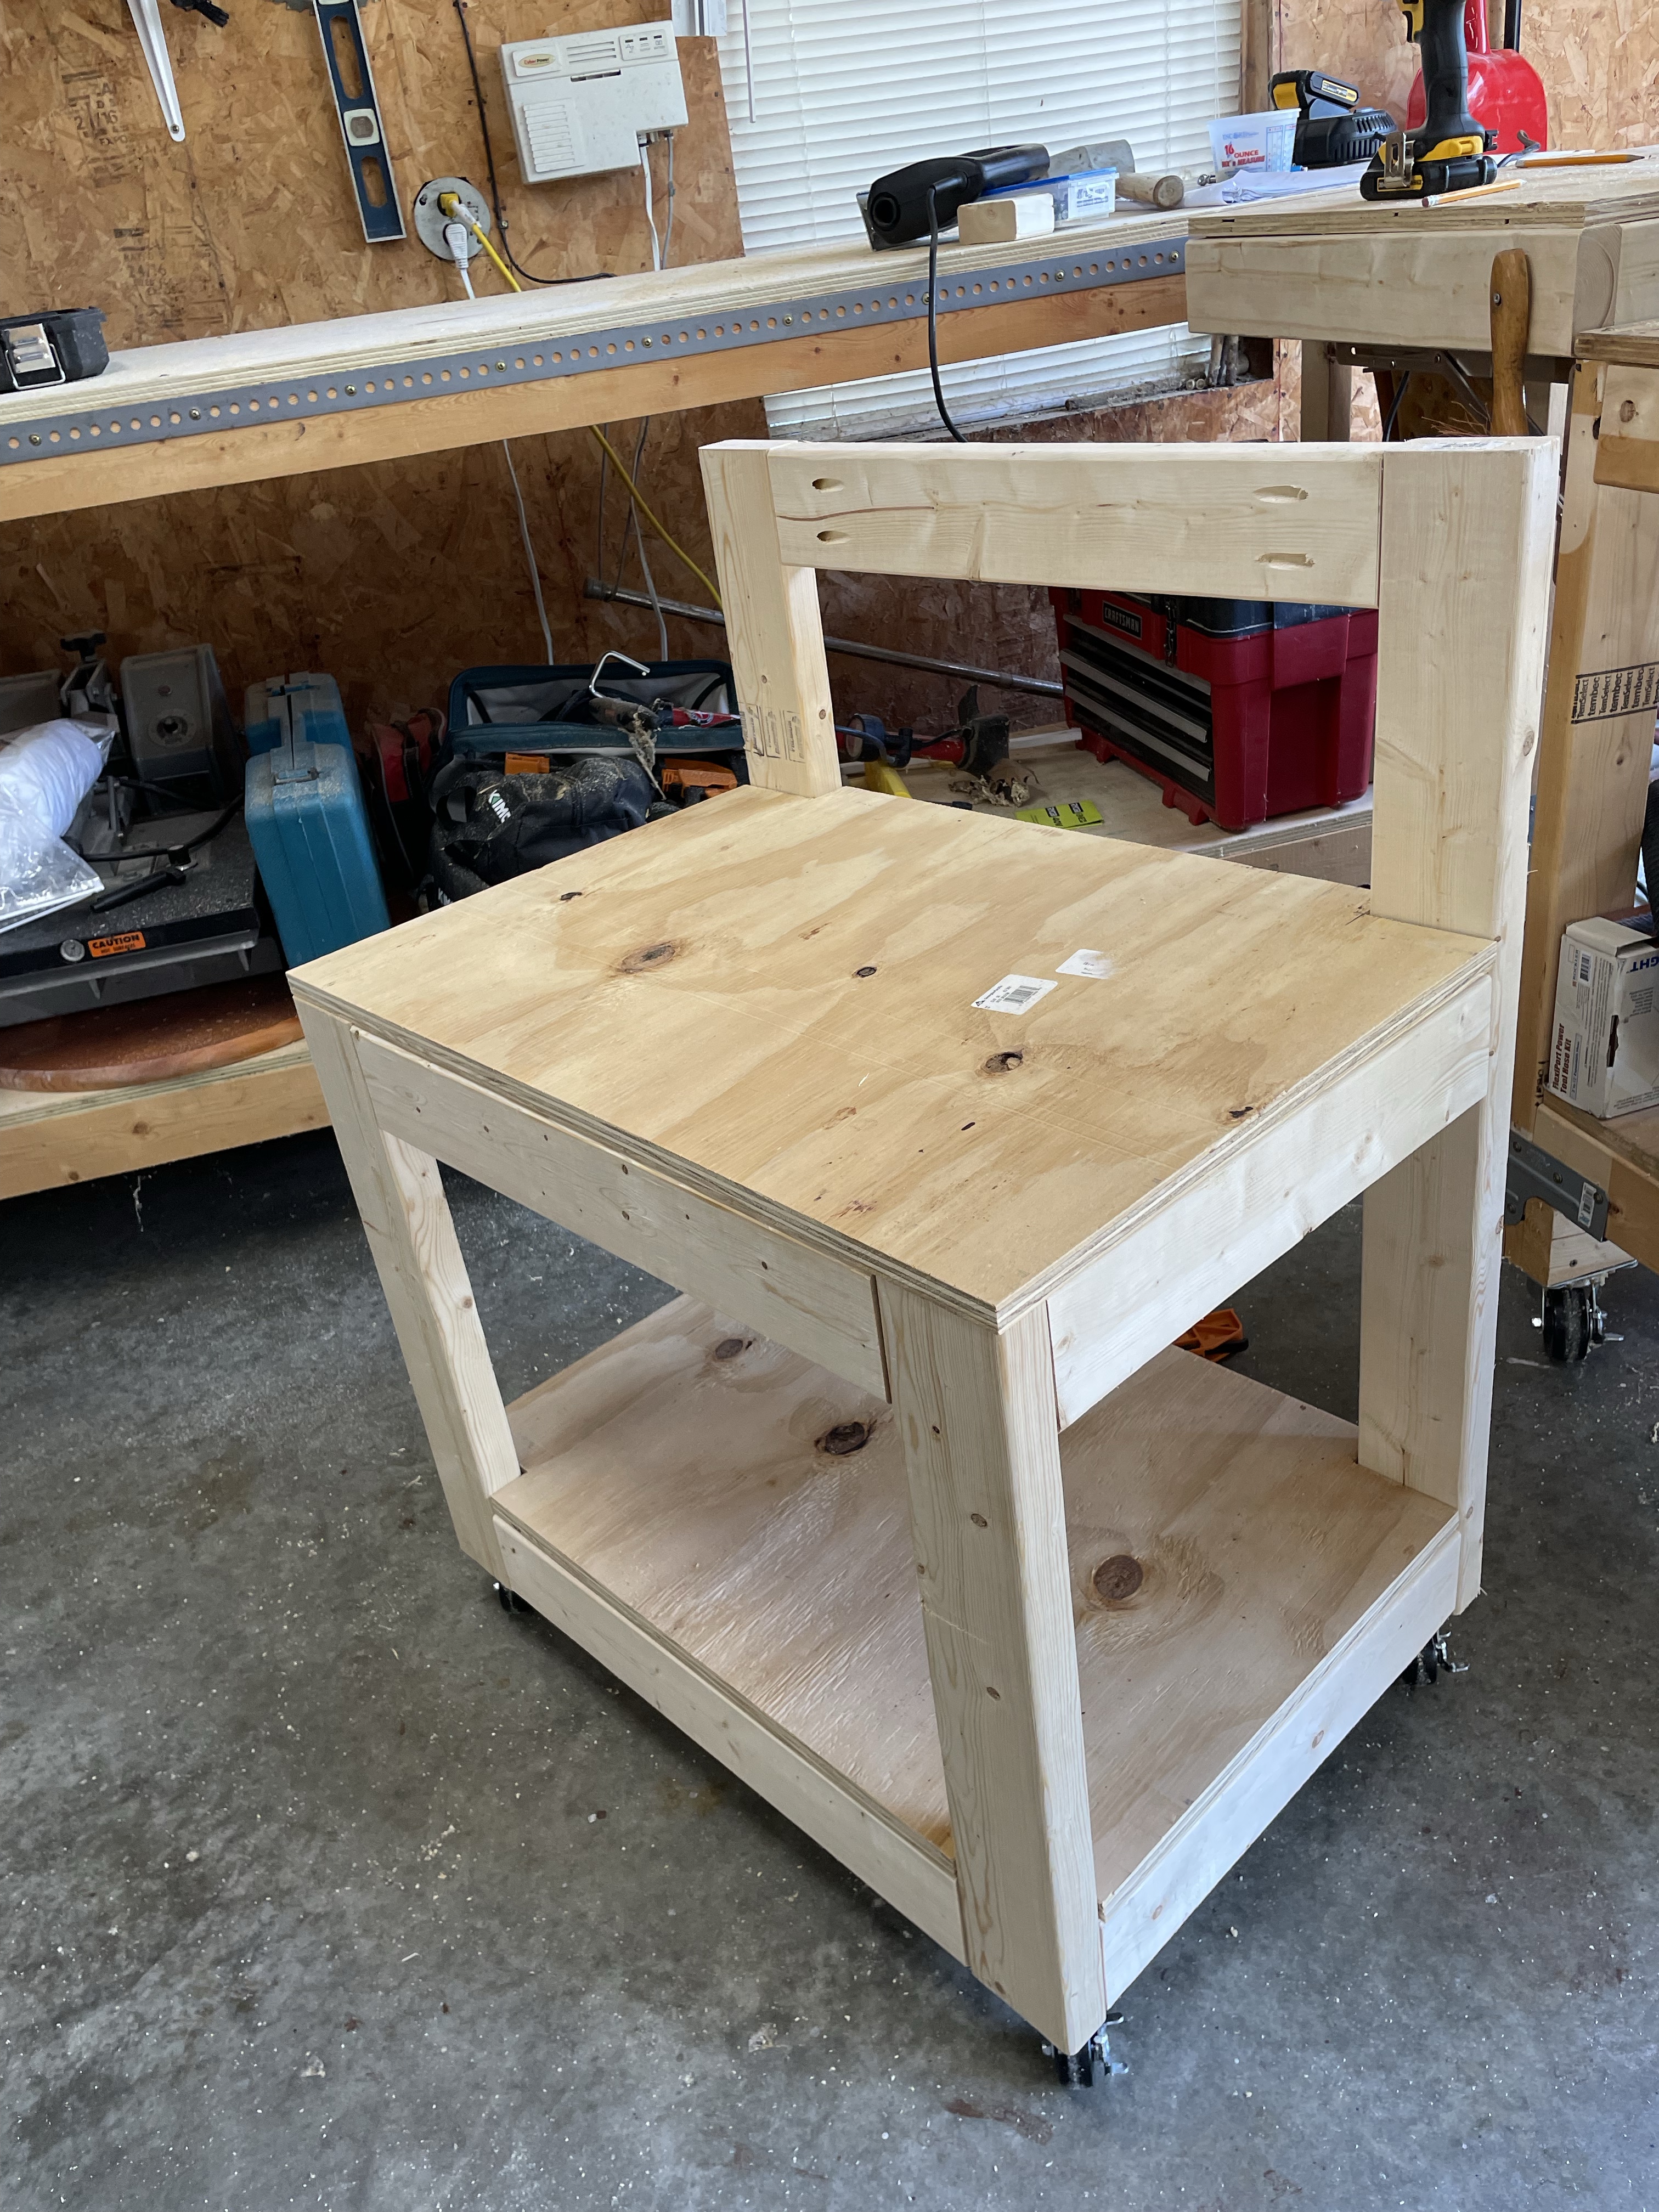

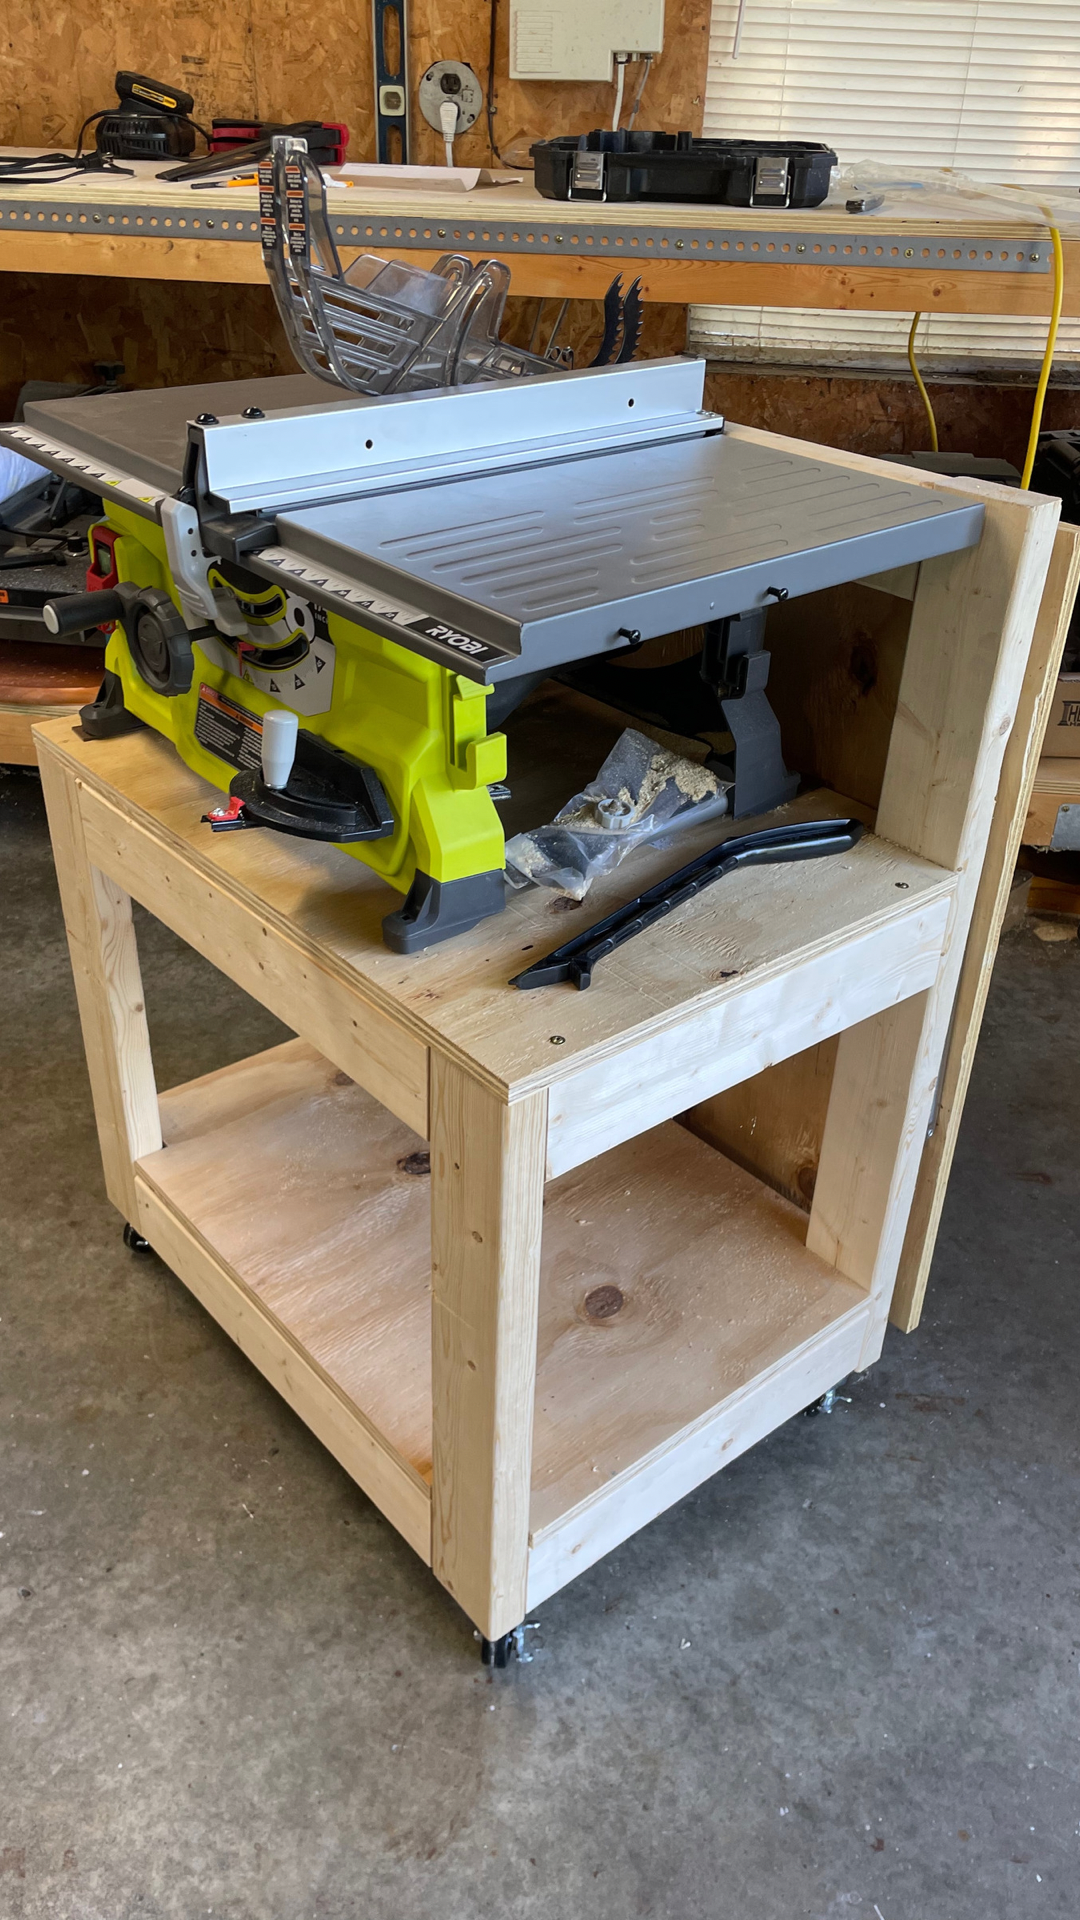
Your table should now look like this. A shelf for the table saw and a shelf for other tools or your table saw accessories and safety gear. I even put my saw on it and gave it a spin to see how well it moved and how well the locking casters kept it still. Now to add the collapsible shelf.
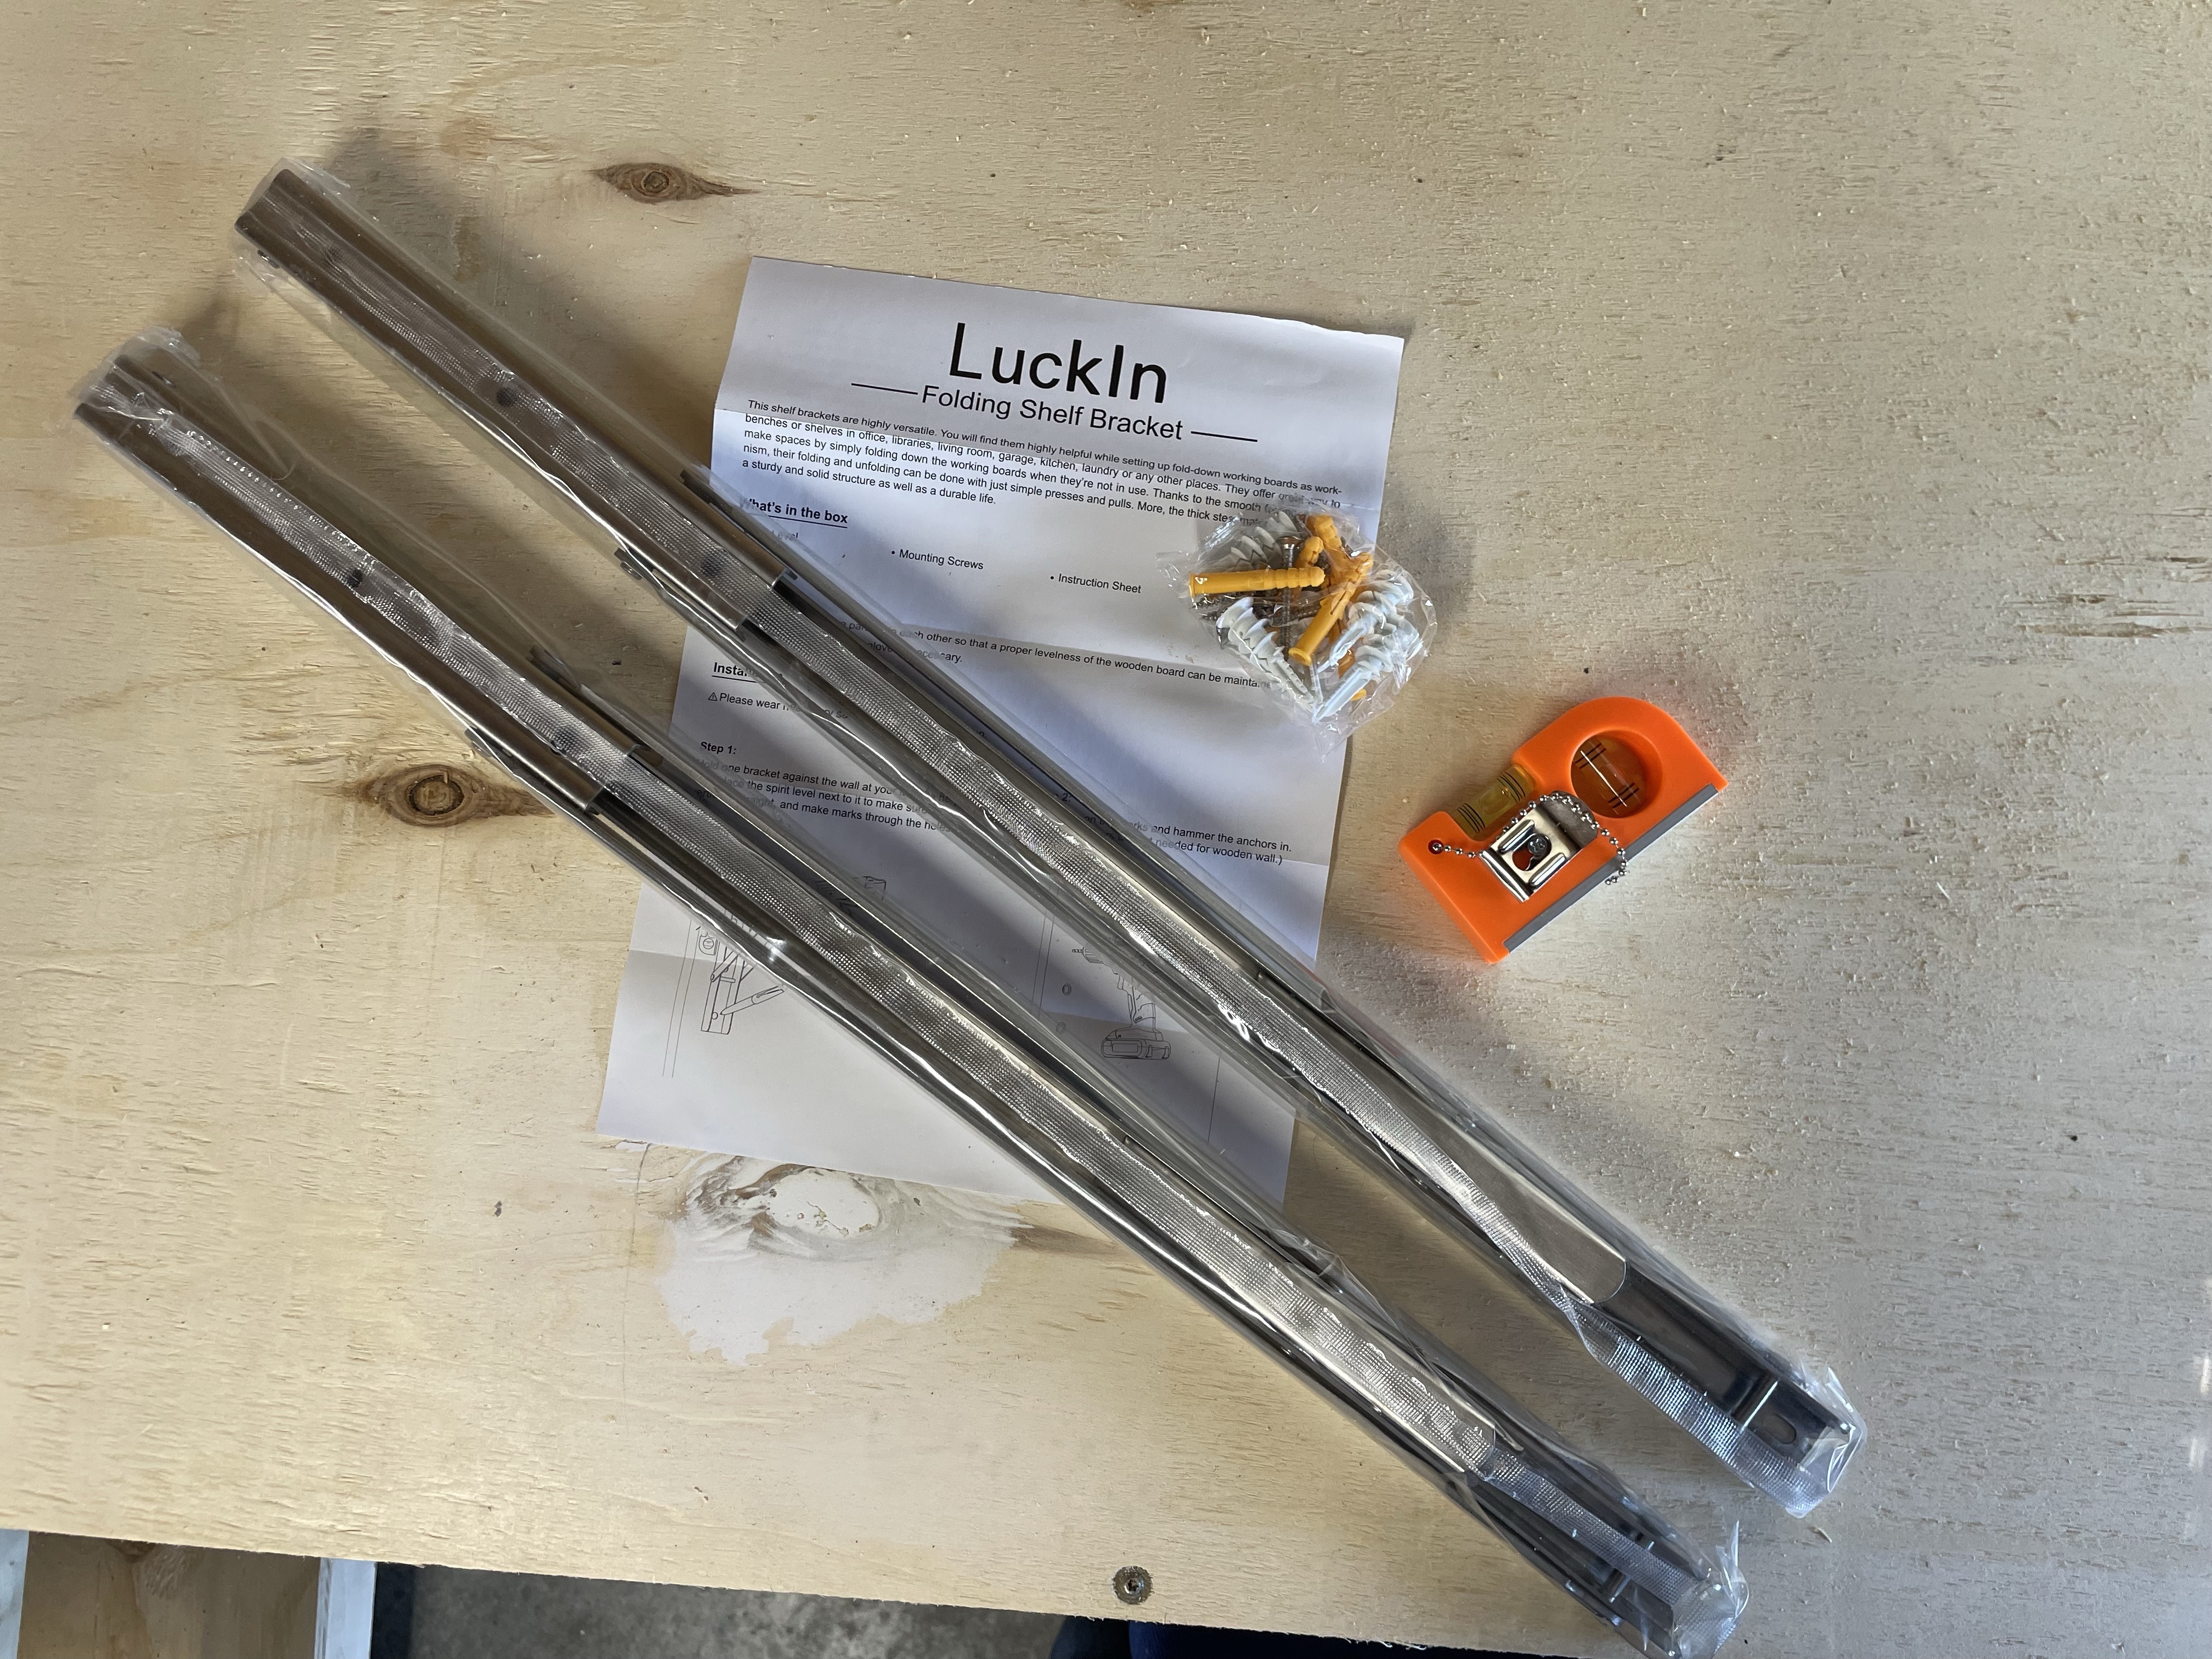
I added 2 of these 24″ folding shelf brackets to the frame like pictured above.They come with a cute little level but the magnet in it doesn’t actually hold so I used my own. I measured the width of my plywood for the out feed table which is 3/4″ and marked a level line across the top. This is where I will align the top of my brackets. you need to make sure they are level both horizontally and vertically for them to function correctly.
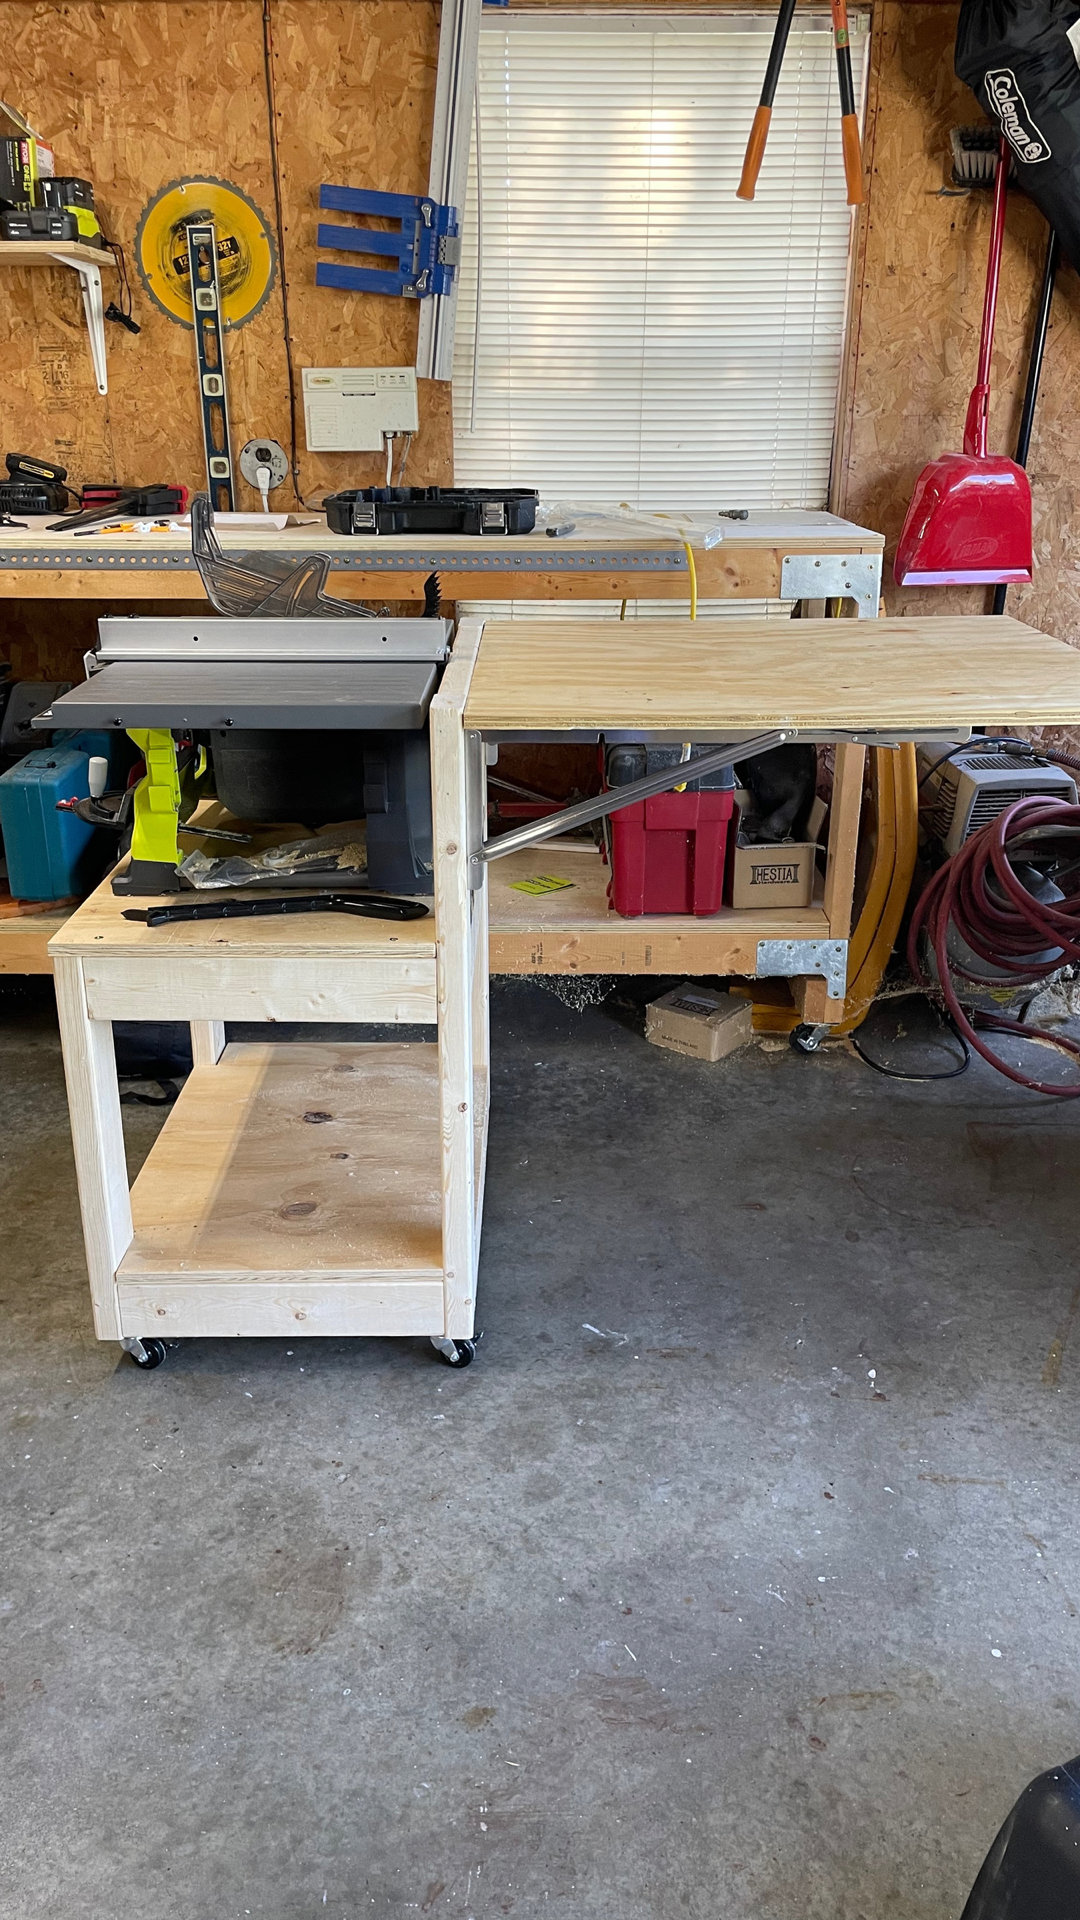
Once they are attached you can attach your out feed table. I opened my brackets and lined up my board so that it is smooth and level with my table saw top, so that anything I cut on the saw will slide smoothly without any kind of stops or bumps. You will need an extra long phillips screwdriver bit or an bit extension like I used in order to get to some of these screws. The set comes with six long screws and eight small screws. I used the long screws to attach the brackets to the frame and the short ones for the out feed table because I chose not to build a frame for this piece and add it directly to the brackets.
I recommend adding a foot/leg under the table extension to support it for any larger or heavier pieces of material.


When adding these brackets to my Miter Saw table I did have a bit of a headache trying to get them lined up perfectly. They just didn’t seem to want to shut all the way. I found out by accident that if they snag just a bit it is best to let gravity help. I lifted the table to the upright position, then squeezed the buttons to release them and let it fall. The weight of the wood helped to close them perfectly and now there isn’t any issues. Again, I’m sure this isn’t in the assembly instructions for a reason so do this at your own risk. For this table I just pushed it down and it sits perfectly flat, talk about luck!
This table is the perfect size for my small space and the brackets hold up to 300lbs so its perfect for my small projects. I probably wouldn’t be ripping sheets of plywood down with this. I would definitely stick with a circular saw and straight edge for that, at least in my shop. I hope you enjoyed this post and can’t wait to see what you are inspired to make.
Note!!!! This table is not built to cut large sheets of heavy woods such as plywood. This table was built for cutting smaller pieces or even ripping long pieces. If wanting to cut larger and/or heavier pieces I recommend a circular saw or a table saw station that has a stationary out feed table.


Will you please reference a plan to download…?
LikeLike
There is no plan to download. Just the directions in the post. Sorry
LikeLike
How do you find the castors? Even though they lock do you not get some movement from the swivel on them? I love the compact design of this stand but am not sure if it would be more stable on plain legs, although then obviously there is the issue of portability.
LikeLike
I went with pretty small casters so I don’t get a lot of movement. However I do use a stop block if I’m cutting anything large or heavy so there is no movement at all. I may change the casters out in the future for a set that folds out so it’s stationary when using though. I think that would be a significant upgrade to this.
LikeLike
to stop movement, run a 2×4 across the botton on each side and attach it with hinges that fold outward….attach wheels to the 2×4’s. when the wheels are under the unit wheel it around…when ready to cut , swing each board out and lower base onto floor for stability. The hinged 2×4’s, when swung out, will be facing up.
LikeLike
This is a great idea! Very similar to what I will be doing to my Folding Table Saw Station this spring.
LikeLike
sorry..the wheels will be facing up
LikeLike