
The things you do for love! So I get a text from my husband that looks like this.
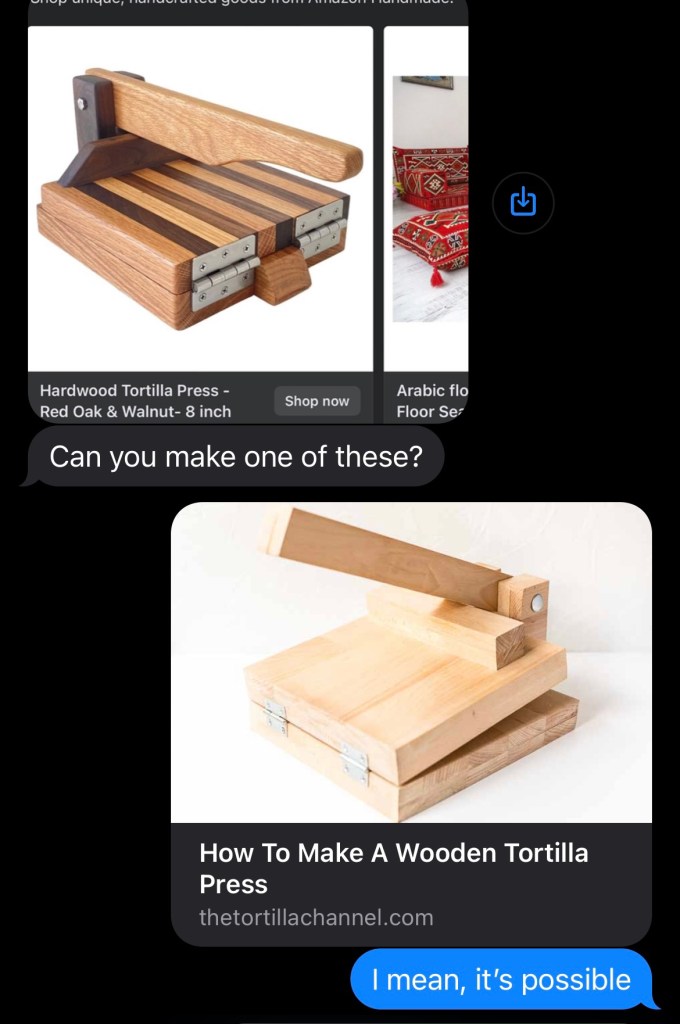
So off I go to the internet to see what I can find. I browsed Google as well as Pinterest and there are so many plans. There are even some great videos on YouTube including this one which is my favorite
Disclosure: This post may contain affiliate links. Meaning I get a commission if you decide to purchase through my links, through no cost to you.
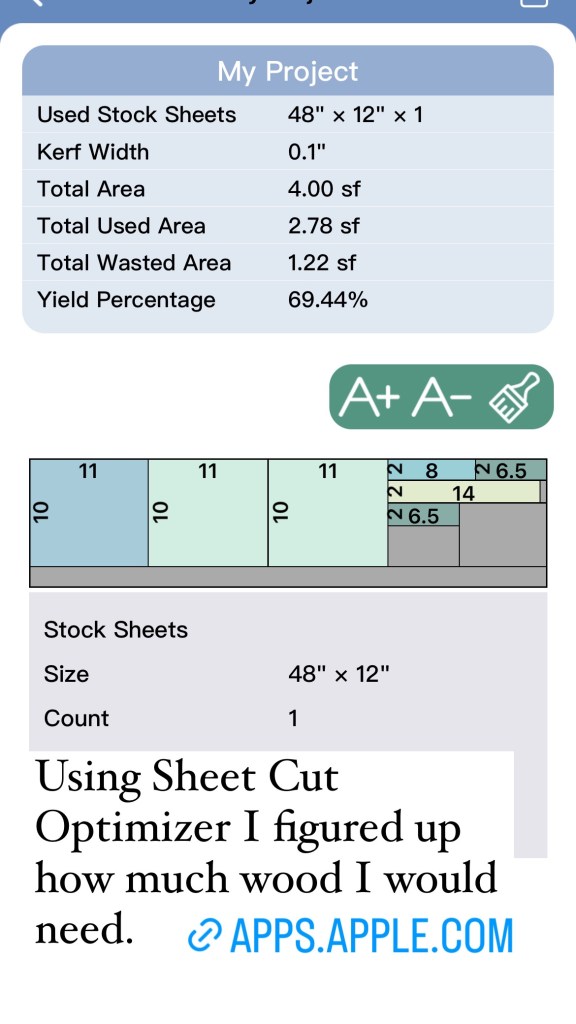
So of course I needed to make one. It’s not perfect but It is easy and usable. I started by drawing out my blend of an idea and used a free app called Sheet Cut Optimizer to help me figure out how much wood I would need to use and how to cut it with the least amount of waste.
For this project you need a hardwood like Walnut, Mahogany, Maple or in my case Aspen. Mostly because I wanted to keep the cost low and my local hardware store doesn’t carry as many options and I didn’t want to drive 30 minutes for one piece of wood.

This is a list of supplies that I used
- 1-1″x12″x4′ hard wood board like Aspen
- 2-2″ hinges
- 1-5/16″ x 4 1/2″ Carriage Bolt
- 1-5/16″ nut or wingnut
- 2-washers to fit the 5/16″ Bolt
- Wood Glue
- 4-3″ screws
- Some Butcher Block oil and sealer (make sure it is food safe) I used this Watco Brand Oil and Sealer. They have some with a food safe stain in it as well.
Cut List
- 3-10″x11″ (top and bottom)
- 1-2″x8″ (Stop) cut both edges on a 35 degree angle
- 4-2″x
6.5″(handle stands) - 1-2″x14″ (handle)
- 2-1″x2″ (small block in front)
- 2-1” x1/4” (for shims between bottom and stands)
After cutting all of my pieces I sanded them really smooth with some 22 grit sandpaper and then used some Gorilla Wood Glue to glue two pieces together for the bottom. I then glued the Stop to the back center of the top piece (not pictured here) and then glued handle stands together, they should each be two pieces thick, as well as the two small pieces to make the block for the front (this block is only cosmetic so it’s not really necessary, just something extra)

After letting the glue dry overnight I did some more sanding to make sure that all of my pieces were smooth and there wasn’t any edges misaligned. Now it is time to drill the hole in the handle and the two handle stands. I clamped them so that they were level across the top and then drilled a hole big enough for my bolt in the center. If you have a router you can round off your edges. I did this to my handle and the top board, this is just something extra to make it look special.


Now it is time to seal your wood. I used the Watco Brand ButcherBlock Oil and Sealer in clear, but they do have some with stain.

I used some of these foam hobby brushes to apply three coats to all of the surfaces, sanding them with some fine steel wool, but you can also use 400 grit sandpaper.

This was the most time consuming part because it takes 6 hours to dry between coats.
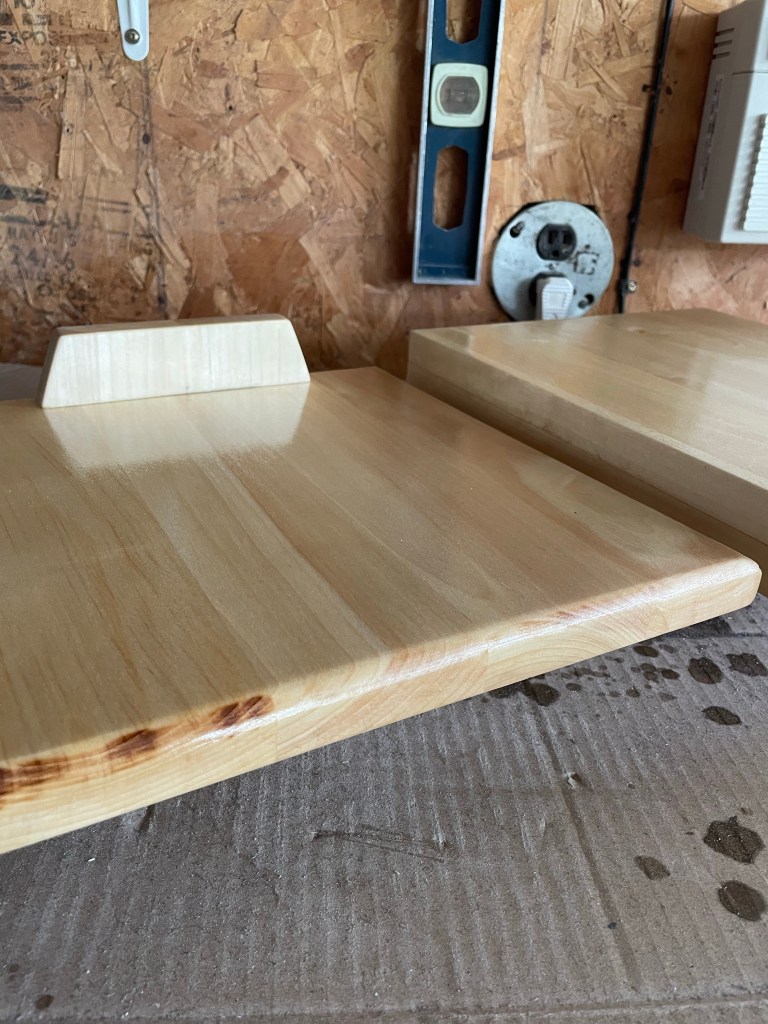
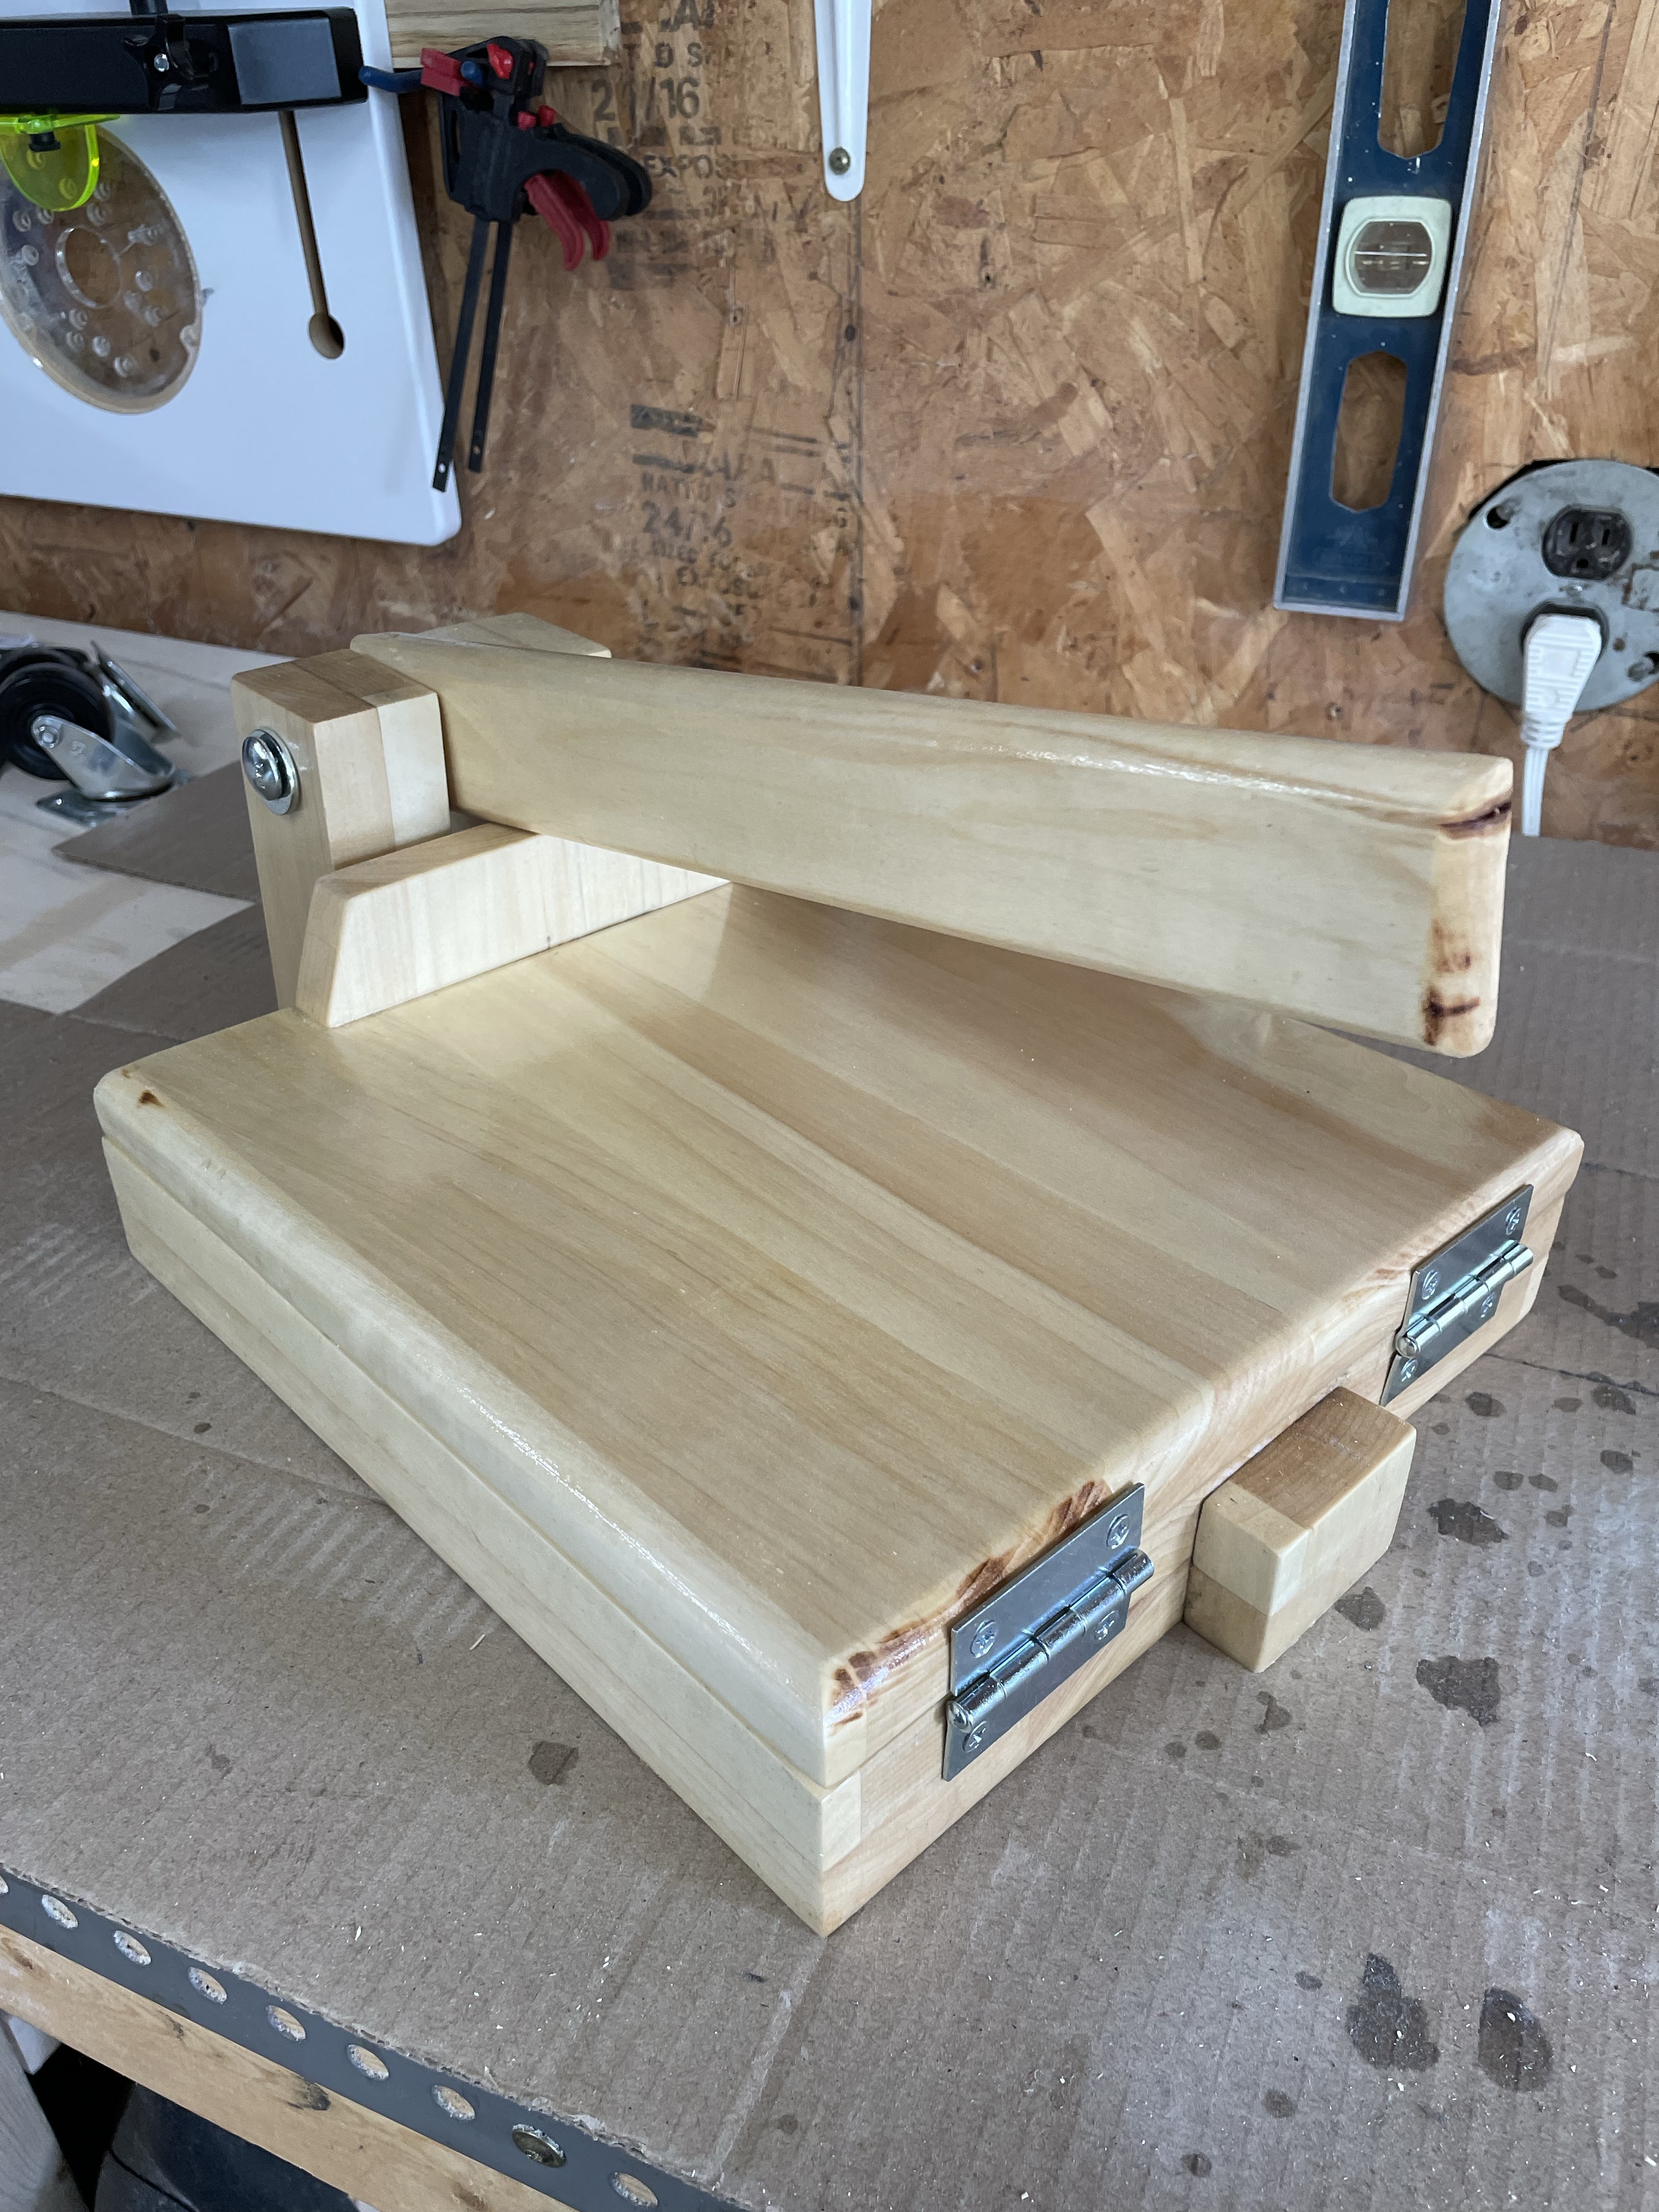
It is so worth it though. Look at that shine!

Add your handle with the Carriage Bolt to the handle stands, making sure to put a washer on the bolt on each side where it goes in and out of the wood.
Now you just need to find your center for the bottom so you can place your two handle stands where you want them, with just enough space for the handle to move freely in between them. I added a couple 1/4” shims between the handle stands and the base so my top could open and close smoothly, then using wood glue and some 3″ screws I attached the handle stands to the bottom piece as shown above.
Next you will lay the bottom piece down and set the top piece on it, I put stacks of about 6 playing cards in between the two pieces, to mimic the thickness of a tortilla, and then added the hinges.


Now you are ready to go make some tortillas! We used a recipe we found on Reddit but I’d would love to hear about your favorite tortilla recipes. Shoot me a message on Instagram or Facebook with some of your favorites!
Check out more of my makes here on http://www.CraftyRidge.com as well as on Instagram and Facebook!


Prepare the Masa Dough: Start by preparing masa dough, which is made from corn flour (masa harina) mixed with water and sometimes salt. Knead the dough until it is smooth and pliable, then divide it into small balls, roughly the size of a golf ball.
LikeLike
I just made one of these. I see you used playing cards for spacers. What about the other end of the press? Wont the pressure make the tortillas 1/8 on one side, but too thin on the other, or do you add a second spacer opposite the hinges? Thanks!
LikeLike
I used the same size spacer across the entire piece.
LikeLike
I used a spacer too. When I lower the upper plate, there’s the required 1/8” space, but at the fulcrum end, the plates have no gap. Did I do something wrong, or should I add a sliver of wood on the lower plate at the fulcrum end? I never made tortillas. I’m making this for my daughter-in-law!
LikeLike
I don’t think you will need any extra pacers as the dough flattens. At least I didn’t.
LikeLike